Categories
3D Printing Education

Why 3D Printers are Right for Your Classroom

We’re often asked if the kit-like 3D printers, usually marketed as a cool toy for consumers, and costing less than professional 3D printers, would be sufficient for a classroom. While these printers are okay for occasional printing in your garage, they don’t stand up to the rigor of daily use (whether by kids or adults), nor do they produce reliable and repeatable results.

Why Professional-Grade 3D Printers Save Money in the Long-Term

Investing in 3D printers designed for education will provide you the best long term return on investment, and reliably produce the best educational outcomes. The cheaper consumer-focused 3D printer is enticing, but they are typically only used for a few months before most realize they need a more robust tool.

Dynamism only sells professional-grade printers that will endure daily use, are easy to maintain, and generally modular–so if repairs are needed the vast majority are simple part swaps. Our printers are designed and manufactured for the heavy, everyday use in the educational 3D printer lab, classroom, factory floor, or engineer’s daily use.  These are a larger upfront investment than consumer-focused printers, but a lower cost of long-term ownership, and immeasurably better ownership experience due to their reliability and accuracy. 

Dynamism Makes 3D Printing Affordable for Education

In many cases we, working with our maker partners, can offer special Educator-only pricing. Fill out the form below to view your savings.

What Works for Schools

3D printing in education comes in three easy pieces: 3D printers, the consumable that is used for printing (filament or resin), and software.

There are many options when it comes to top tier 3D printers for school, but we have some top recommendations. For schools with the most budget flexibility, we recommend Ultimaker. Headquartered in the Netherlands, Ultimaker produces a beautiful quality and well manufactured 3D printer that is sophisticated, yet easy to use. They are simple to set up and run reliably.

As with any mechanical tool, occasional maintenance is needed. Ultimaker’s design makes this easy. And, our Warranty Plans can protect you against any unexpected cost for years to come.

Which Ultimaker 3D printers does Dynamism offer?

Ultimaker S5

Ultimaker’s best-seller is the Ultimaker S5. This printer also features Ultimaker’s largest potential print volume.

Be sure to check out the Ultimaker S5 Pro Bundle, which includes air manager (with filtration), material station (for easy changing of filament colors or types), and all the necessary software to get your curriculum running.

Ultimaker S3

Ultimaker S3 is very similar to the Ultimaker S5, but with a smaller potential printing area.  It also uses less space on a tabletop. So, if space is a concern, or if you want more printers in a given budget, the Ultimaker S3 is an excellent option.

Ultimaker 2+ Connect

Out of the box, the Ultimaker 2+ Connect may be our most easy printer to start working with. The biggest difference between the 2+ and the S5/S3 is that it is a single extraction printer. This means that your prints will only be made with one filament type and may be less complex, but that can be a benefit depending on your classroom’s needs.

If you’d like even more functionality, we offer the Ultimaker 2+ Connect Air Manager Bundle which will help to filtrate your printing process.

Resin or Filament is the substance that your 3D printer uses to create an object. There are many 3D printing materials available, but if you would like to go with an Ultimaker 3D printer, we recommend Dynamism filament, or Ultimaker filament.

A Useful Filament Tool

An optional add-on for the Ultimaker S5 is the ever-so-useful Material Station. This add-on helps to ensure that your filament is stored in optimal humidity, automatically changes spools when necessary, and is included in the S5 Pro Bundle. Simply put, it’s an elegant solution.

Software can truly enhance your 3D printing experience. Some key programs cut down on time spent printing and materials used for your Software is a critical aspect of the 3D printing experience. Good software will configure your printer to achieve goals faster, and with less use of materials.

Which Software is compatible with Ultimakers, and how does it save money?

A lot of our Ultimaker bundles come with top of the line 3D printing software. Some bundles feature Ultimaker Essentials/Personal Software, but other Ultimaker printers give you eligibility for huge discounts on SmartSlice for Ultimaker Cura.

Ultimaker Cura

Ultimaker Cura is the world’s most popular 3D printing software. As a simple to use slicing software, Cura integrates smoothly with any workflow through their Marketplace plugins. With the needs of both beginners and engineers, Cura will make the most of your Ultimaker with a more speedy and reliable printing process.

SmartSlice

SmartSlice is a state of the art software designed for Ultimaker Cura that helps you optimize prints efficiently. By improving build instructions to the 3D printer, SmartSlice helps to cut down on the amount of time you spend printing and the amount of filament you use during your print, resulting in time and cost savings.

The Final Verdict

As you can see, there are many ways to gain efficiency with professional 3D printers. Although they are more expensive up front, they will save on overhead costs and give you back some much needed time for other tasks. Additionally, there are a plethora of materials, parts, and 3D printing software to limit waste and get more out of a given budget.

Whether you’re ready to start now, or you still have questions, check out our catalog of printers, materials, parts, and other useful tools. Or, if you want a more personal touch, reach out directly to one of our Product Experts at 1-800-711-6277 or sales@dynamism.com.

Exclusive Discounts & Detailed Recommendations

To kick off 2022, Dynamism created a brand-new EDU Purchasing Guide for our Nation’s educators to get a better idea of which items might help their classroom. Take a look at our guide by filling out the form below!

Image
Categories
3D Printing Education

What to know before 3D printing in the classroom

3D printing has exploded in importance in recent years, and now schools are starting to embrace the revolutionary technology. Still, 3D printing can remain a challenging technology to embrace for those without previous experience.

So, let our team at Dynamism walk you through the process, and we’ll start with answering some of the most common questions from educators.

What do I need to get started?

There are some key pieces of information that you need to know before you can start printing in your classroom. Take a look at our checklist below!

✅ 3D Printer

First is choosing the right 3D printer. Choosing the right 3D printer will have the largest impact on the rest of your experience. We can offer expert, unbiased, and detailed advice. As a start, we have a few recommendations below.

Which 3D printer will benefit my classroom?

Deciding which 3D printers to bring to your classroom can be confusing. Here are some tips from our extensive experience working with educators.

Grades K-6

For classrooms filled with eager kids, having printing bandwidth, easy accessible storage, and detailed plans to jump-start your learning are your keys to running a successful program. See which of our options is for you with our recommendations below.

Image

Looking to get started with a fast and simple-to-use 3D Printer that comes with numerous bells and whistles? Our MakerBot Sketch Classroom Bundle comes with two printers, an abundance of extra filament, and over 600 educational lesson plans to keep you covered through your entire school year and beyond. Order this bundle to get a great plug-and-play, straight out of the box, experience.

Image

Another excellent option for the classroom is our Dremel DigiLab 3D45 Education Package. It includes the Dremel DigiLab 3D45 printer, along with extra filament, 30 lesson plans for hands-on experience, and the opportunity to acquire 4 hours of Online Professional Development Credit through ISTE. To learn how to earn your 4 hours, please visit Dremel’s ISTE Certified PD Certificate Access Walkthrough.

Grades 7-12

For classrooms with students looking to expand their knowledge and get a little more serious with 3D Printing capabilities, here are excellent options.

Image

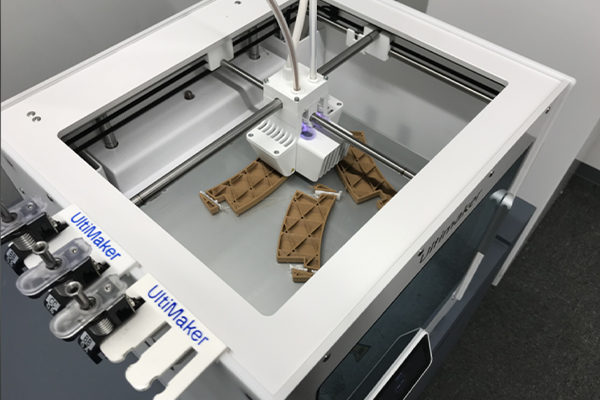
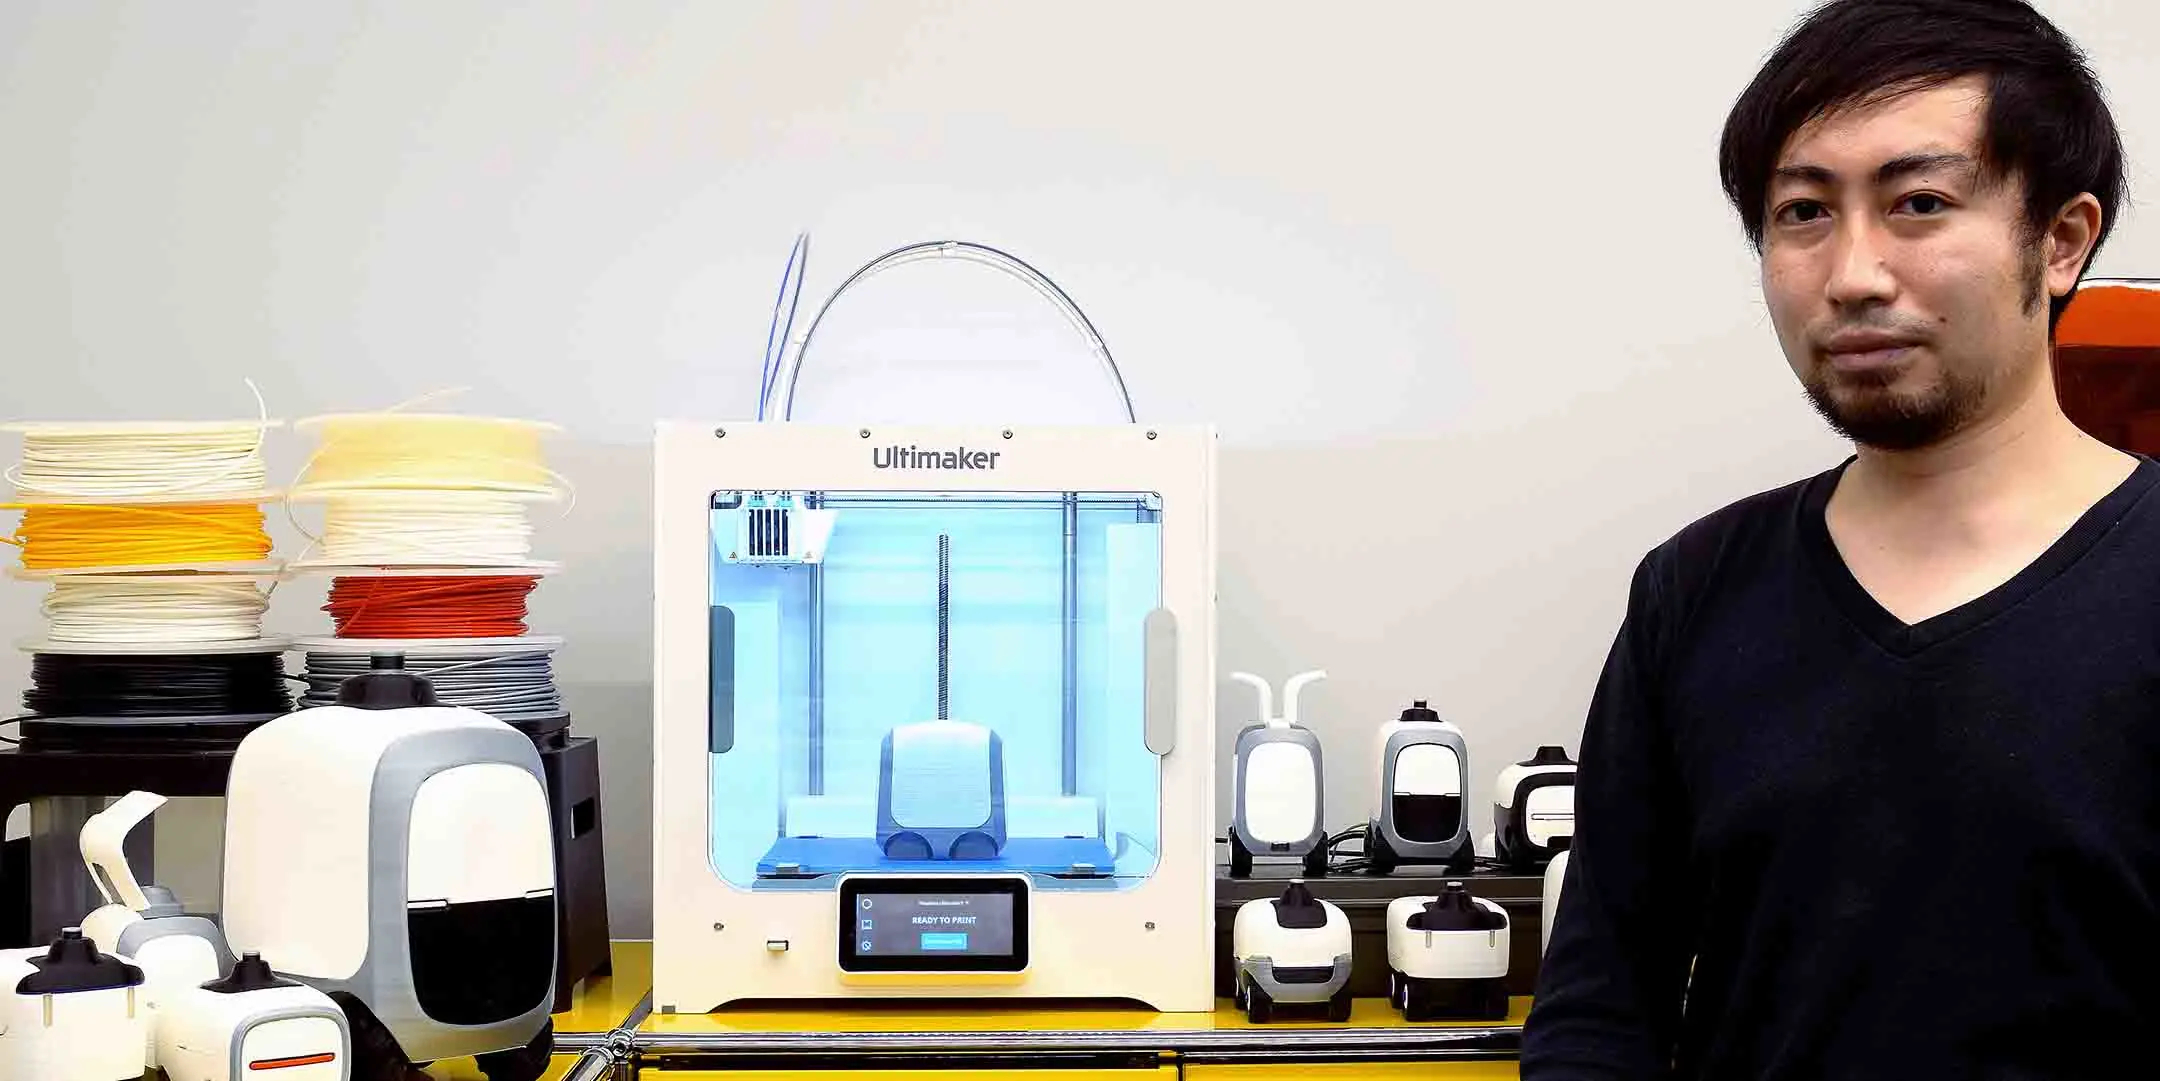
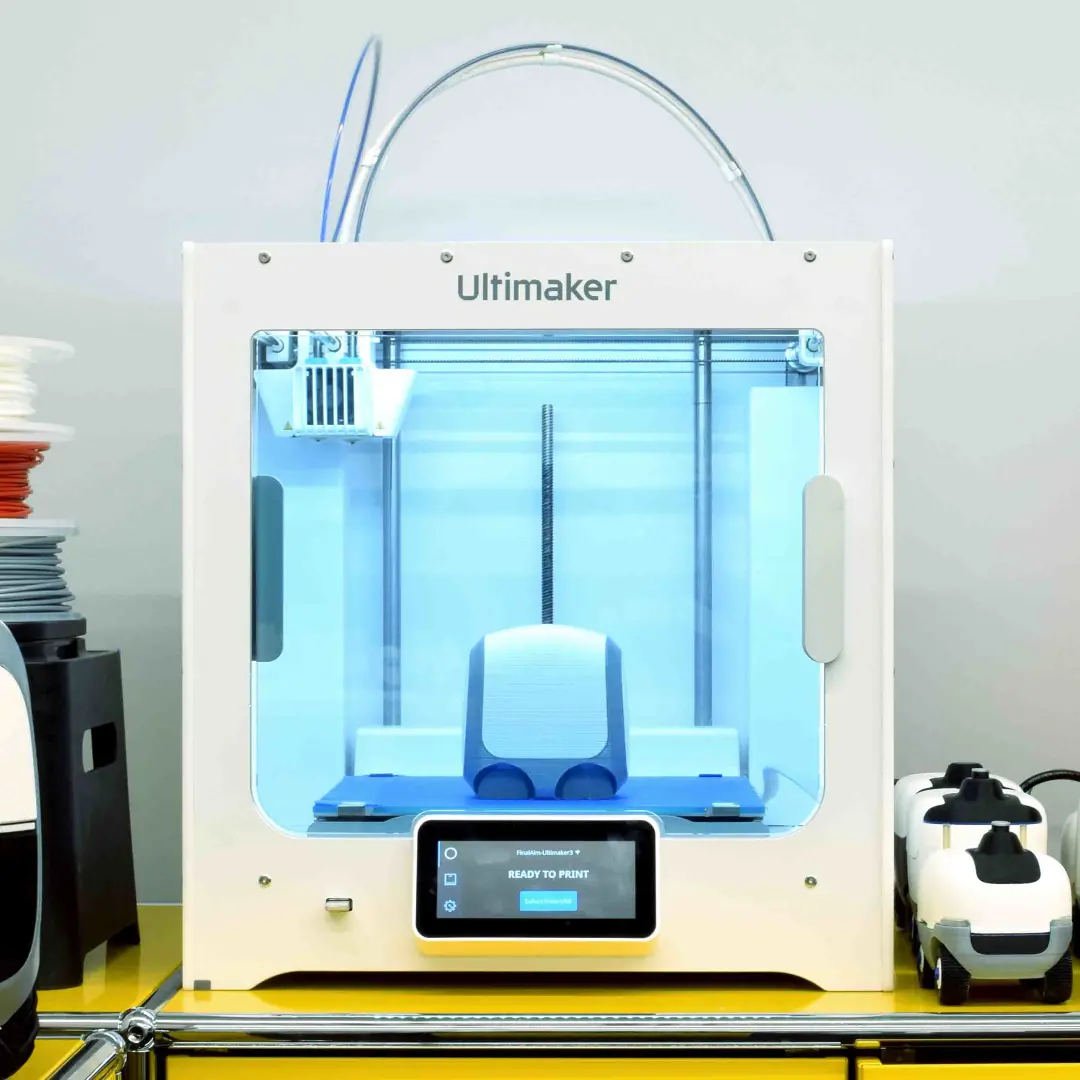
If you’re ready to bring 3D printing technology used by thousands of professional engineers to your classroom, try multi-color dual-head extrusion with the Ultimaker S5. Here, students get hands-on and real-world experience creating industrial-quality parts using Fused Filament Fabrication (FFF) printing.

Additionally, our bundle provides you with a seamless printing experience, with the inclusion of the Air Manager, Material Station, and professional grade software.

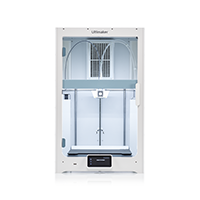
Generally, the Ultimaker Series is an excellent option for new and experienced users alike. Take a look at our catalog of Ultimakers to see what might fit your needs.

Image

Many of our Dynamism printer packages come with useful tools, and the Formlabs Form 3+ Complete Package is no exception. The Resin Tank, Build Platform, Finish Kit, and other add-ons will provide you with extraordinary value to get the most out of your printer. To view our complete selection of Formlabs printers, please click here.

Do you have some more questions?

If you aren’t quite sure what products would be best for your classroom, please check out our buying guide for teachers, reach out to one of our product experts by phone at 1-800-711-6277, email us at sales@dynamism.com, or simply enter your information below and we will get back to you shortly.
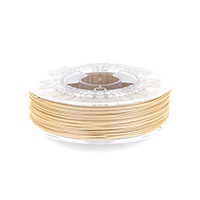
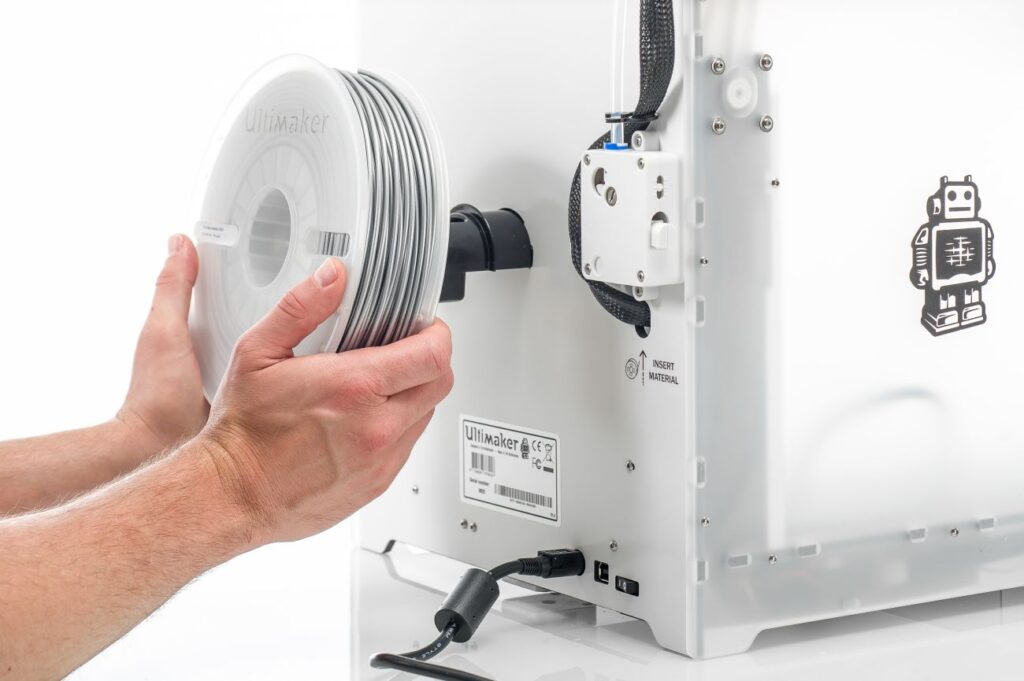
✅ Filament & Resin

Think of filament or resin as analogous to ink in traditional printers. When printing, you’ll need the physical component that is transformed into your model. Generally speaking, filament arrives as a long thread on a spool, while resin is a liquid hardened in the 3D printing process.

Printer brands that use filament include MakerBot and Ultimaker, and printer brands that use resin include Formlabs and Nexa3D.

✅ Software

Having the right software for your 3D printer makes operating it so much easier. We recommend utilizing PrintLab’s Classroom Software. PrintLab’s software can serve the entire classroom or just the teacher. This software gives you everything needed to get your lesson plan rolling. 

In short, PrintLab Classroom provides you with top-of-the-line teacher training, lesson plans, and certifications.

✅ 3D Scanner (Optional)

3D scanners are not a classroom necessity, but they’re a remarkable luxury. 

Using pinpoint laser technology, these scanners create truly remarkable 3D models of real-world objects. Scan any object you want to use in your project, and print it straight away. To view our handheld 3D scanner guide, please click here.

What if I need Technical Support?

Whether you’re a beginner or a veteran, 3D printing can be challenging. At Dynamism, we pride ourselves on providing you with unparalleled, unlimited, and always free support by toll-free phone, email, or chat.

In addition to unlimited free support, we also offer paid support options that include setup and training by videoconference or on-site, at your location. You can book a session with an expert from our staff to walk you through your product set up, and can even provide step-by-step instructions in real-time on any complications that you may be experiencing. 

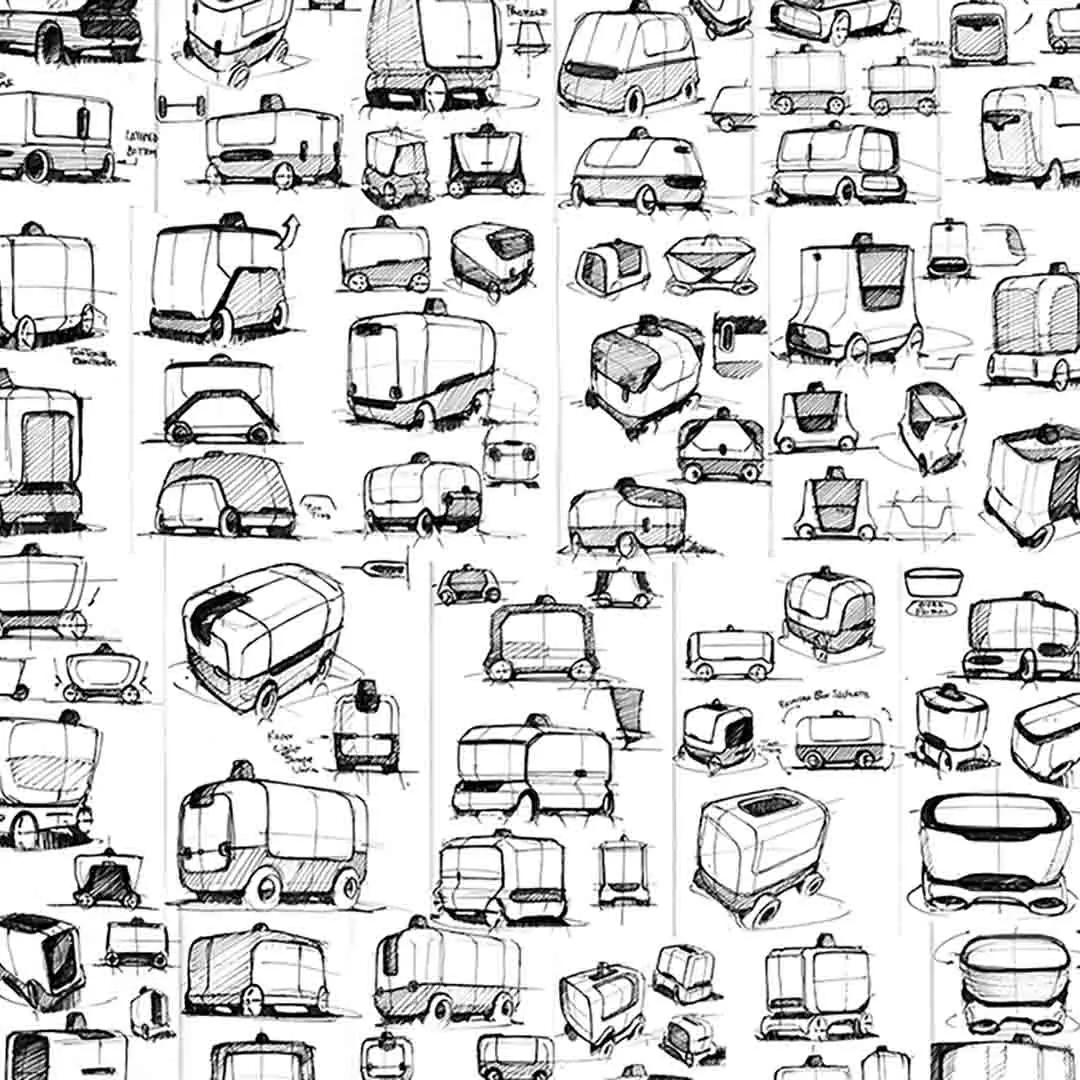
Where do I find things to print?

You can either design your own files to print, or you can utilize online communities to download designs. If you’re looking for creative projects to print, check out some of these links:

  • Thingiverse by MakerBot: As an open and completely free community, Thingiverse is a blessing to enthusiasts and professionals alike. You can search for specific builds, or sort by most popular prints if you just want inspiration.
  • YouMagine: YouMagine is an accumulation of designs, blogs, and collections that can keep you and your entire classroom busy for years. We especially like incredibly unique collections page!
  • 3DShook: Although it’s not free, it is a very low cost way to purchase designs and packages of files. 3DShook is an excellent option for educators. 
  • Pinshape: Pinshape combines both free and paid designs of 3D printing enthusiasts from around the world. Download print projects, comb through their online forum or take part in one of their many 3D printing contests. Additionally, you can take a look at projects, tutorials, and pre-designed lesson plans.
  • Instructables: As an online platform set to inspire creative designs, Instructables can keep you and your classroom occupied for the entire year. Instructables has a dedicated page just for teachers, including featured projects broken down by subject and grade level.

Exclusive Discounts & Detailed Recommendations

To kick off 2022, Dynamism created a brand-new EDU Purchasing Guide for our Nation’s educators to get a better idea of which items might help their classroom. Take a look at our guide by filling out the form below!

Image
Categories
Engineering Manufacturing

Yasuhide Yokoi and Final Aim Inc’s Autonomous Delivery Robot

Yasuhide “Yasu” Yokoi is the cofounder of design and technology firm Final Aim Inc., which works with laboratories, startups, and multinational companies to transform ideas into tangible solutions. There, he and his team use Ultimaker 3D printers to better enable rapid design iterations during the prototyping phase.

One of the company’s latest projects is the OSTAW Camello, an autonomous package delivery robot.

Revolutionizing Package Delivery

The Camello was designed to address issues in the delivery logistics chain in Singapore, which causes high shipment costs and operational complexities. Due to low loads and long waiting periods in loading and unloading bays, package deliveries are often inefficient – a fact exacerbated by high delivery volumes and tight delivery deadlines.

To tackle this challenge, Final Aim collaborated with a Singaporean robotics start-up OTSAW Digital PTE LTD, with the Camello being the final product.

The Camello is user friendly, featuring an ergonomic cargo space and sleek design – optimal for Singapore’s urban environment. Plans are currently underway for it to be used by various industrial key players, delivery companies, and retailers throughout Singapore, creating an improved ecosystem that provides smooth and efficient delivery to customers, while increasing profit margins for those businesses that use it.

The Birth of the Camello

As with any product, several phases were involved in Camello’s design, with the Ultimaker S3, Ultimaker Cura, and CAD software acting as Yasu’s and Final Aim’s greatest companions throughout the process.

First came the robot’s concept development and evaluation. From the initiation to ideation, he used both hand-drawn design sketches and CAD software.

Image
Industrial designer Yasuhide Yokoi with the Ultimaker S3 and Camello prototypes

Once he developed the idea, Yasu began the process of presenting it to the higher-level management, frontline members, and end-users. This divergent approach allowed Yasu to gain as much feedback as possible, which he could then use to refine, improve, and further flesh out his concept.

Image
Early sketches of design ideas
Image
A CAD design iteration, which can be 3D printed

Next came the prototyping phase. As Yasu now had numerous potential ideas, he needed to rapidly actualize them – often on tight deadlines. Luckily, this was a task that 3D printing was able to easily handle. Compared to other common prototyping methods such as sculpting or carving from Styrofoam, chemical wood, or industrial clay, 3D printing is much more efficient – freeing up time for Yasu to work on other design tasks.

“More than just cost-cutting, 3D printing has added value to my process,” Yasu said.

Image
3D printed iterations of the robot, ready to be tested and compared

Finalizing an Intuitive Design

Yasu was also responsible for ensuring that the Camello’s final design was of excellent quality. As his works often incorporate organically curved surfaces and silhouettes, which are often difficult to implement, he needed to create numerous iterations. 3D printing technology utilizes the contour layers of printouts to analyze the curvature of surfaces – essentially an equivalent to the zebra mapping that CAD software performs.

“The Ultimaker S3’s double extrusion feature has [also] been essential to my everyday design applications,” Yasu said. “Together with Breakaway and PVA material, my printing experience has become exponentially more efficient. I am deeply satisfied with the resulting quality as it leaves behind no support structure remaining.”

Image
Final design iteration prototyped on the Ultimaker S3
Image
Production Camello delivering groceries in Singapore

For the Camello to be a success, its design had to be intuitive and accessible at first glance. The design process, therefore, involved divergent ideation, exploring all possibilities, which were then carefully narrowed in focus. Development speed was also critical for stakeholders’ requests.

3D printing enabled these stakeholders to see and touch a physical product, deepening their understanding of the Camello’s concept and design – and streamlining the decision-making process.

Image

Go To Market Faster

Discover how 3D printing can accelerate your development cycles, with insights including:

  • How to 3D print faster to test more iterations
  • 4 essential applications for designers
  • The ideal design studio setup and workflow
  • And lots more handy tips and tricks!
Categories
3D Printing

Support Resources

ultimaker
Resources

Whether you’re eagerly awaiting the arrival of your new printer, looking for the quickest way to get started, or troubleshooting an issue, we have a variety of guides and tutorials available here.

Learn More
formlabs
Resources

Whether you’re eagerly awaiting the arrival of your new printer, looking for the quickest way to get started, or troubleshooting an issue, we have a variety of guides and tutorials available here.

Learn More

Questions? Contact Us Today.

1-800-711-6277 support@dynamism.com

Categories
3D Printing

Loading Filament On The Ultimaker 2+ Connect

Before you can start printing on the Ultimaker S3/S5, you need to load materials into the printer. For the first use, it is recommended to use the spools of  Tough PLA and PVA that come with the Ultimaker S3/S5.


Getting Started

Before you can start printing on the Ultimaker 2+ Connect, you need to load material into the printer. For the first use, it is recommended to use the spools of  Tough PLA that comes with the Ultimaker 2+ Connect.


Mount The Material Spool

01

Place the spool with the material on the spool holder. Make sure to put it with the material in a counter-clockwise direction, so that the material can enter the feeder from the bottom.

02

Wait for the Ultimaker 2+ to heat up the nozzle. This will ensure the material can flow through the nozzle while the printer feeds filament.


Insert Material Into Feeder

01

Insert the material into the feeder and gently push it until the material is grabbed by the feeder and is visible in the Bowden tube. Select confirm to continue.

02

Confirm when the new material extrudes from the nozzle.

Categories
3D Printing

Ultimaker 2+ Connect Unboxing and Setup

The Ultimaker 2+ Connect comes in reusable, durable packaging, specially designed to protect your 3D printer. Ensure you save your packaging, it will be required to send the machine in should it require warranty service and will ensure the safety of your machine when changing locations.


Follow the steps below to unpack your Ultimaker 2+ Connect:

01

Place the box on the ground.

02

Remove the plastic locking clips from the lower section of the box.

03

Holding the handles, lift the upper section of the box, and place it aside.

04

Take the quick start guide, safety and warranty information booklet, accessory box, and a spool of filament off the upper cardboard piece.

05

Remove the upper cardboard section and four foam pieces.

06

Carefully lift the Ultimaker 2+ Connect out of the bottom cardboard section and foam pieces.

07

Place the printer on a flat surface.


What Is Included With Your Printer

The Ultimaker 2+ Connect is supplied with several hardware accessories. Check if all these items are included before continuing:

Accessories
  • Glass plate
  • Spool holder
  • Power adapter and cable
  • Ethernet cable
  • USB stick
  • Calibration card
  • 0.4 mm nozzle
Consumables
  • PLA Silver Metallic 750 g
  • Glue stick
  • Oil
  • Grease
Tools
  • Hex screwdriver 2 mm
  • Hex key 2.5 mm
  • Nozzle wrench
  • Print head calibration aid
Documents
  • Quick start guide
  • Safety and warranty information

Get to Know Your Printer

Familiarize yourself with the different components of the Ultimaker 2+ Connect. Throughout our documentation, these terms will be used frequently.


Hardware Installation and Setup

01

Insert the spool holder into the back panel and push until it snaps into place.

Install spool holder
02

Open the front build plate clamps to insert the glass plate.

Open front build plate clamps
03

Slide the glass plate into the rear build plate clamps, then close the front clamps.

Install glass build plate
04

Connect the power cable to the printer with the flat side facing down and the other end to a power outlet.

Plug in printer

Categories
3D Printing

Ultimaker Support Resources

Categories
3D Printing

Ultimaker 2+ Connect Air Manager Installation

The Ultimaker 2+ Connect Air Manager gives you more confidence and setup flexibility. Designed to increase user safety, it removes up to 95% of ultrafine particles and shields users from hot and moving components. This is an excellent addition to any office or education-focused environment.


The Air Manager is delivered in separate components, which can be installed in a few easy steps.

01

Align the filter housing with the back of the Ultimaker 2+ Connect.

02

Guide the Bowden tube and print head cable into the slot.

03

Push down on the filter housing until it clicks firmly into place.

04

Gently push the filter completely into the filter housing, with the tab facing down.

05

Place the cover over the filter housing and align it with the top panel; ensure there are no gaps between the cover and the printer.

06

Connect the Air Manager cable to the port at the back of the Air Manager and ensure it is secure with the clip.

07

Guide the Air Manager cable around the left side of the spool holder.

08

Plug the cable into the OUT port at the back of the Ultimaker 2+ Connect.

09

Take the front enclosure and place the hinge profile on the front panel as shown.

10

Push the handle against the panel; the magnet will hold the front enclosure in place when closed.

The front enclosure must be installed when the Ultimaker 2+ Connect is printing. To remove the print, or for certain maintenance procedures, the front enclosure must be removed. This can be conveniently placed on the top of the printer, resting against the Air Manager cover.

Familiarize yourself with the different components of the Ultimaker 2+ Connect Air Manager. Throughout our documentation, these terms will be used frequently.

Categories
3D Printing

Ultimaker S3 / S5 Unboxing and Setup

The Ultimaker S3 and S5 come in reusable, durable packaging, specially designed to protect your 3D printer. Ensure you save your packaging, it will be required to send the machine in should it require warranty service and will ensure the safety of your machine when changing locations.


Follow the steps below to unpack your Ultimaker S3 / S5:


What Is Included With Your Printer

Accessories
  • Glass build plate
  • Spool holder with material guide
  • Power cable
  • Ethernet cable
  • USB stick
  • Print core AA 0.4
  • Print core BB 0.4
  • XY calibration sheet
  • Calibration card
  • Nozzle cover (3x)
Consumables
  • Tough PLA (750 g)
  • PVA (750 g)
  • Glue stick
  • Oil
  • Grease
Tools
  • Hex screwdriver 2 mm

Get to Know Your Printer

Familiarize yourself with the different components of the Ultimaker S5/S3. Throughout our documentation these terms will be used frequently.

1. Glass door(s)

2. Print head

3. Build plate

4. Build plate clamps

5. Touchscreen

6. USB port

7. Feeder 2

8. Bowden tubes

9. Feeder 1

10. Power socket and switch

11. Ethernet port

12. Double spoolholder with NFC cable

13. NFC socket


Hardware Setup Directions

Install the Bowden Tubes (Ultimaker S5 Only)

01

Remove the clamp clips from the print head.

Remove bowden clamp clip
02

Insert the Bowden tubes. The Bowden tubes connect to the corresponding numbers on the print head and feeder.

Install bowden tubes
03

Secure the Bowden tubes with the clamp clips.

Install bowden clamp clip
04

Fit the print head cable clips onto Bowden tube 2.

Attach bowden tube 2 to print head cable

Install and Connect the NFC Spool Holder

01

Insert the spool holder into the back panel and push until it snaps into place.

02

Secure the cable from the spool holder behind the cable clips in the back panel.

Install spool holder
03

Connect the cable to the NFC socket at the back of the printer.

Route and install NFC cable

Install the Glass Build Plate

01

Open the glass doors.

Open front doors
02

Open the two build plate clamps at the front of the build plate.

Open front build plate clamps
03

Gently slide the glass plate onto the build plate and ensure that it snaps into the build plate clamps at the back.

Install glass build plate
04

Close the two build plate clamps at the front to secure the glass build plate and close the glass doors.

Close front build plate clamps

Plug-In and Power On!

01

Connect the power cable to the power socket at the back of the Ultimaker S5.

02

Plug the other side of the cable into a wall outlet.

03

Turn on the power switch near the power connection on the printer.


A World of Resources Available to You

Whether you are new to 3D printing or an expert with years under your belt, you can never have too many resources. View our full support and resource section for various OEM’s here.


Next Steps

Loading filament

Before you can start printing on the Ultimaker S3/S5, you need to load materials into the printer. For the first use, it is recommended to use the spools of Tough PLA and PVA that come with the Ultimaker S3/S5.

Model Preparation and Slicing

Cura and other slicing programs transform a CAD model (STL, OBJ, 3MF) into a set of machine instructions that tell your printer how to create your model.

Removing Prints

After your print has completed, it will need to removed from the glass build plate. There are a few separate techniques to accomplish this, and each can have advantages depending on the specific part and whether any additional adhesives were used.

Categories
3D Printing

Recommended Maintenance For Ultimaker 2+ Connect

Maintenance Schedule

To keep your Ultimaker 2+ Connect in optimal condition, we recommend the following maintenance schedule, based on 1,500 printing hours per year. If you are printing more than 1,500 hours per year be sure to adjust your maintenance schedule accordingly.

Click the link for each support topic for detailed instructions in how to accomplish your task.