Categories
3D Printing Education

Why 3D Printers are Right for Your Classroom

We’re often asked if the kit-like 3D printers, usually marketed as a cool toy for consumers, and costing less than professional 3D printers, would be sufficient for a classroom. While these printers are okay for occasional printing in your garage, they don’t stand up to the rigor of daily use (whether by kids or adults), nor do they produce reliable and repeatable results.

Why Professional-Grade 3D Printers Save Money in the Long-Term

Investing in 3D printers designed for education will provide you the best long term return on investment, and reliably produce the best educational outcomes. The cheaper consumer-focused 3D printer is enticing, but they are typically only used for a few months before most realize they need a more robust tool.

Dynamism only sells professional-grade printers that will endure daily use, are easy to maintain, and generally modular–so if repairs are needed the vast majority are simple part swaps. Our printers are designed and manufactured for the heavy, everyday use in the educational 3D printer lab, classroom, factory floor, or engineer’s daily use.  These are a larger upfront investment than consumer-focused printers, but a lower cost of long-term ownership, and immeasurably better ownership experience due to their reliability and accuracy. 

Dynamism Makes 3D Printing Affordable for Education

In many cases we, working with our maker partners, can offer special Educator-only pricing. Fill out the form below to view your savings.

What Works for Schools

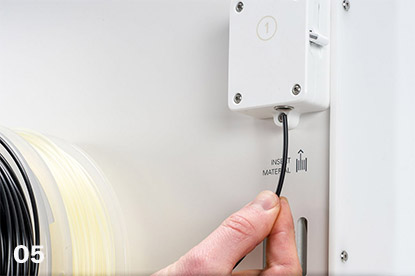
3D printing in education comes in three easy pieces: 3D printers, the consumable that is used for printing (filament or resin), and software.

There are many options when it comes to top tier 3D printers for school, but we have some top recommendations. For schools with the most budget flexibility, we recommend Ultimaker. Headquartered in the Netherlands, Ultimaker produces a beautiful quality and well manufactured 3D printer that is sophisticated, yet easy to use. They are simple to set up and run reliably.

As with any mechanical tool, occasional maintenance is needed. Ultimaker’s design makes this easy. And, our Warranty Plans can protect you against any unexpected cost for years to come.

Which Ultimaker 3D printers does Dynamism offer?

Ultimaker S5

Ultimaker’s best-seller is the Ultimaker S5. This printer also features Ultimaker’s largest potential print volume.

Be sure to check out the Ultimaker S5 Pro Bundle, which includes air manager (with filtration), material station (for easy changing of filament colors or types), and all the necessary software to get your curriculum running.

Ultimaker S3

Ultimaker S3 is very similar to the Ultimaker S5, but with a smaller potential printing area.  It also uses less space on a tabletop. So, if space is a concern, or if you want more printers in a given budget, the Ultimaker S3 is an excellent option.

Ultimaker 2+ Connect

Out of the box, the Ultimaker 2+ Connect may be our most easy printer to start working with. The biggest difference between the 2+ and the S5/S3 is that it is a single extraction printer. This means that your prints will only be made with one filament type and may be less complex, but that can be a benefit depending on your classroom’s needs.

If you’d like even more functionality, we offer the Ultimaker 2+ Connect Air Manager Bundle which will help to filtrate your printing process.

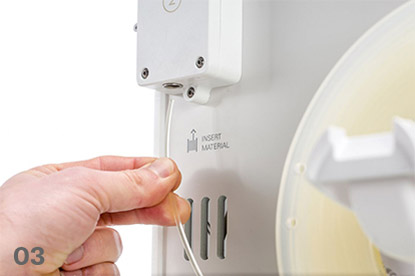
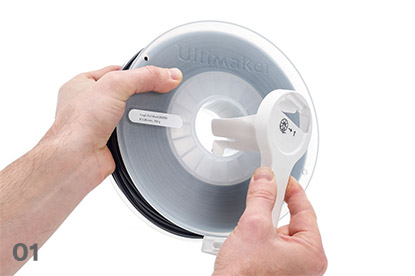
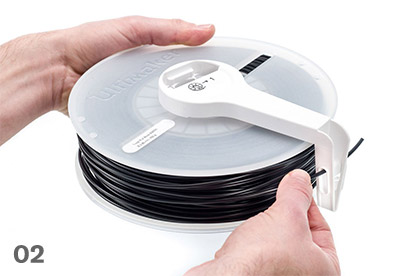
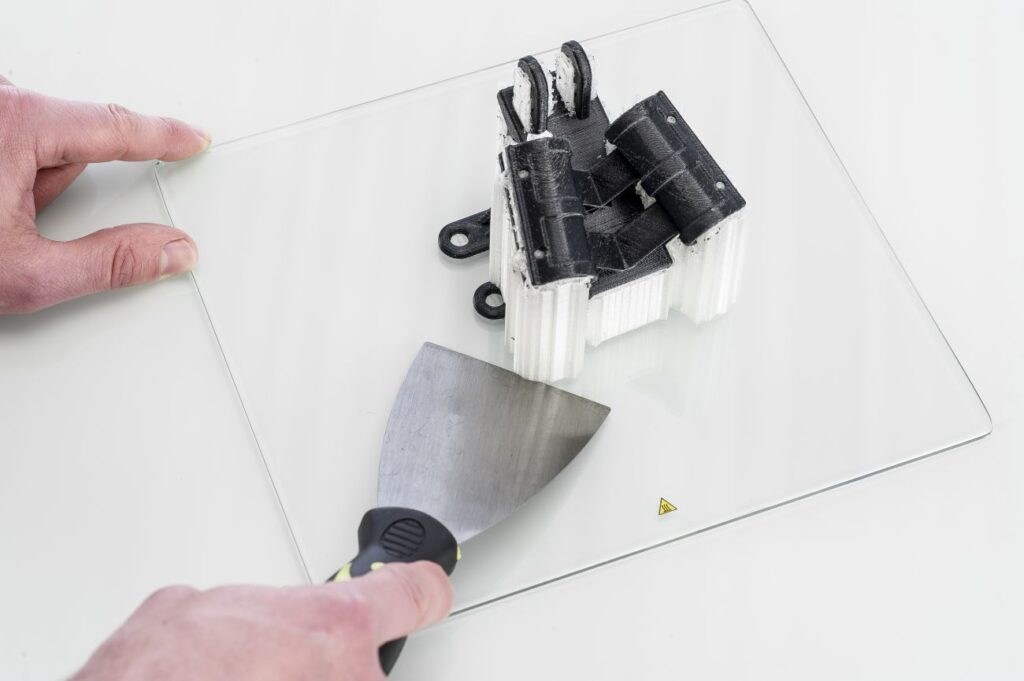
Resin or Filament is the substance that your 3D printer uses to create an object. There are many 3D printing materials available, but if you would like to go with an Ultimaker 3D printer, we recommend Dynamism filament, or Ultimaker filament.

A Useful Filament Tool

An optional add-on for the Ultimaker S5 is the ever-so-useful Material Station. This add-on helps to ensure that your filament is stored in optimal humidity, automatically changes spools when necessary, and is included in the S5 Pro Bundle. Simply put, it’s an elegant solution.

Software can truly enhance your 3D printing experience. Some key programs cut down on time spent printing and materials used for your Software is a critical aspect of the 3D printing experience. Good software will configure your printer to achieve goals faster, and with less use of materials.

Which Software is compatible with Ultimakers, and how does it save money?

A lot of our Ultimaker bundles come with top of the line 3D printing software. Some bundles feature Ultimaker Essentials/Personal Software, but other Ultimaker printers give you eligibility for huge discounts on SmartSlice for Ultimaker Cura.
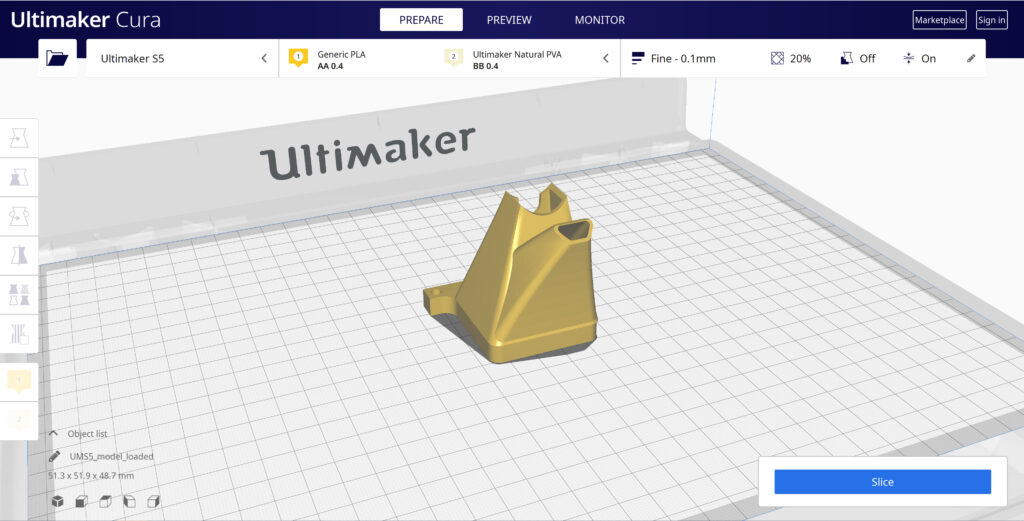
Ultimaker Cura

Ultimaker Cura is the world’s most popular 3D printing software. As a simple to use slicing software, Cura integrates smoothly with any workflow through their Marketplace plugins. With the needs of both beginners and engineers, Cura will make the most of your Ultimaker with a more speedy and reliable printing process.

SmartSlice

SmartSlice is a state of the art software designed for Ultimaker Cura that helps you optimize prints efficiently. By improving build instructions to the 3D printer, SmartSlice helps to cut down on the amount of time you spend printing and the amount of filament you use during your print, resulting in time and cost savings.

The Final Verdict

As you can see, there are many ways to gain efficiency with professional 3D printers. Although they are more expensive up front, they will save on overhead costs and give you back some much needed time for other tasks. Additionally, there are a plethora of materials, parts, and 3D printing software to limit waste and get more out of a given budget.

Whether you’re ready to start now, or you still have questions, check out our catalog of printers, materials, parts, and other useful tools. Or, if you want a more personal touch, reach out directly to one of our Product Experts at 1-800-711-6277 or sales@dynamism.com.

Exclusive Discounts & Detailed Recommendations

To kick off 2022, Dynamism created a brand-new EDU Purchasing Guide for our Nation’s educators to get a better idea of which items might help their classroom. Take a look at our guide by filling out the form below!

Image
Categories
3D Printing Education

What to know before 3D printing in the classroom

3D printing has exploded in importance in recent years, and now schools are starting to embrace the revolutionary technology. Still, 3D printing can remain a challenging technology to embrace for those without previous experience.

So, let our team at Dynamism walk you through the process, and we’ll start with answering some of the most common questions from educators.

What do I need to get started?

There are some key pieces of information that you need to know before you can start printing in your classroom. Take a look at our checklist below!

✅ 3D Printer

First is choosing the right 3D printer. Choosing the right 3D printer will have the largest impact on the rest of your experience. We can offer expert, unbiased, and detailed advice. As a start, we have a few recommendations below.

Which 3D printer will benefit my classroom?

Deciding which 3D printers to bring to your classroom can be confusing. Here are some tips from our extensive experience working with educators.

Grades K-6

For classrooms filled with eager kids, having printing bandwidth, easy accessible storage, and detailed plans to jump-start your learning are your keys to running a successful program. See which of our options is for you with our recommendations below.

Image

Looking to get started with a fast and simple-to-use 3D Printer that comes with numerous bells and whistles? Our MakerBot Sketch Classroom Bundle comes with two printers, an abundance of extra filament, and over 600 educational lesson plans to keep you covered through your entire school year and beyond. Order this bundle to get a great plug-and-play, straight out of the box, experience.

Image

Another excellent option for the classroom is our Dremel DigiLab 3D45 Education Package. It includes the Dremel DigiLab 3D45 printer, along with extra filament, 30 lesson plans for hands-on experience, and the opportunity to acquire 4 hours of Online Professional Development Credit through ISTE. To learn how to earn your 4 hours, please visit Dremel’s ISTE Certified PD Certificate Access Walkthrough.

Grades 7-12

For classrooms with students looking to expand their knowledge and get a little more serious with 3D Printing capabilities, here are excellent options.

Image

If you’re ready to bring 3D printing technology used by thousands of professional engineers to your classroom, try multi-color dual-head extrusion with the Ultimaker S5. Here, students get hands-on and real-world experience creating industrial-quality parts using Fused Filament Fabrication (FFF) printing.

Additionally, our bundle provides you with a seamless printing experience, with the inclusion of the Air Manager, Material Station, and professional grade software.

Generally, the Ultimaker Series is an excellent option for new and experienced users alike. Take a look at our catalog of Ultimakers to see what might fit your needs.

Image

Many of our Dynamism printer packages come with useful tools, and the Formlabs Form 3+ Complete Package is no exception. The Resin Tank, Build Platform, Finish Kit, and other add-ons will provide you with extraordinary value to get the most out of your printer. To view our complete selection of Formlabs printers, please click here.

Do you have some more questions?

If you aren’t quite sure what products would be best for your classroom, please check out our buying guide for teachers, reach out to one of our product experts by phone at 1-800-711-6277, email us at sales@dynamism.com, or simply enter your information below and we will get back to you shortly.

✅ Filament & Resin

Think of filament or resin as analogous to ink in traditional printers. When printing, you’ll need the physical component that is transformed into your model. Generally speaking, filament arrives as a long thread on a spool, while resin is a liquid hardened in the 3D printing process.

Printer brands that use filament include MakerBot and Ultimaker, and printer brands that use resin include Formlabs and Nexa3D.

✅ Software

Having the right software for your 3D printer makes operating it so much easier. We recommend utilizing PrintLab’s Classroom Software. PrintLab’s software can serve the entire classroom or just the teacher. This software gives you everything needed to get your lesson plan rolling. 

In short, PrintLab Classroom provides you with top-of-the-line teacher training, lesson plans, and certifications.

✅ 3D Scanner (Optional)

3D scanners are not a classroom necessity, but they’re a remarkable luxury. 

Using pinpoint laser technology, these scanners create truly remarkable 3D models of real-world objects. Scan any object you want to use in your project, and print it straight away. To view our handheld 3D scanner guide, please click here.

What if I need Technical Support?

Whether you’re a beginner or a veteran, 3D printing can be challenging. At Dynamism, we pride ourselves on providing you with unparalleled, unlimited, and always free support by toll-free phone, email, or chat.

In addition to unlimited free support, we also offer paid support options that include setup and training by videoconference or on-site, at your location. You can book a session with an expert from our staff to walk you through your product set up, and can even provide step-by-step instructions in real-time on any complications that you may be experiencing. 

Where do I find things to print?

You can either design your own files to print, or you can utilize online communities to download designs. If you’re looking for creative projects to print, check out some of these links:

  • Thingiverse by MakerBot: As an open and completely free community, Thingiverse is a blessing to enthusiasts and professionals alike. You can search for specific builds, or sort by most popular prints if you just want inspiration.
  • YouMagine: YouMagine is an accumulation of designs, blogs, and collections that can keep you and your entire classroom busy for years. We especially like incredibly unique collections page!
  • 3DShook: Although it’s not free, it is a very low cost way to purchase designs and packages of files. 3DShook is an excellent option for educators. 
  • Pinshape: Pinshape combines both free and paid designs of 3D printing enthusiasts from around the world. Download print projects, comb through their online forum or take part in one of their many 3D printing contests. Additionally, you can take a look at projects, tutorials, and pre-designed lesson plans.
  • Instructables: As an online platform set to inspire creative designs, Instructables can keep you and your classroom occupied for the entire year. Instructables has a dedicated page just for teachers, including featured projects broken down by subject and grade level.

Exclusive Discounts & Detailed Recommendations

To kick off 2022, Dynamism created a brand-new EDU Purchasing Guide for our Nation’s educators to get a better idea of which items might help their classroom. Take a look at our guide by filling out the form below!

Image
Categories
3D Printing

Ultimaker Support Resources

Categories
3D Printing

Ultimaker S3 / S5 Unboxing and Setup

The Ultimaker S3 and S5 come in reusable, durable packaging, specially designed to protect your 3D printer. Ensure you save your packaging, it will be required to send the machine in should it require warranty service and will ensure the safety of your machine when changing locations.


Follow the steps below to unpack your Ultimaker S3 / S5:


What Is Included With Your Printer

Accessories
  • Glass build plate
  • Spool holder with material guide
  • Power cable
  • Ethernet cable
  • USB stick
  • Print core AA 0.4
  • Print core BB 0.4
  • XY calibration sheet
  • Calibration card
  • Nozzle cover (3x)
Consumables
  • Tough PLA (750 g)
  • PVA (750 g)
  • Glue stick
  • Oil
  • Grease
Tools
  • Hex screwdriver 2 mm

Get to Know Your Printer

Familiarize yourself with the different components of the Ultimaker S5/S3. Throughout our documentation these terms will be used frequently.

1. Glass door(s)

2. Print head

3. Build plate

4. Build plate clamps

5. Touchscreen

6. USB port

7. Feeder 2

8. Bowden tubes

9. Feeder 1

10. Power socket and switch

11. Ethernet port

12. Double spoolholder with NFC cable

13. NFC socket


Hardware Setup Directions

Install the Bowden Tubes (Ultimaker S5 Only)

01

Remove the clamp clips from the print head.

Remove bowden clamp clip
02

Insert the Bowden tubes. The Bowden tubes connect to the corresponding numbers on the print head and feeder.

Install bowden tubes
03

Secure the Bowden tubes with the clamp clips.

Install bowden clamp clip
04

Fit the print head cable clips onto Bowden tube 2.

Attach bowden tube 2 to print head cable

Install and Connect the NFC Spool Holder

01

Insert the spool holder into the back panel and push until it snaps into place.

02

Secure the cable from the spool holder behind the cable clips in the back panel.

Install spool holder
03

Connect the cable to the NFC socket at the back of the printer.

Route and install NFC cable

Install the Glass Build Plate

01

Open the glass doors.

Open front doors
02

Open the two build plate clamps at the front of the build plate.

Open front build plate clamps
03

Gently slide the glass plate onto the build plate and ensure that it snaps into the build plate clamps at the back.

Install glass build plate
04

Close the two build plate clamps at the front to secure the glass build plate and close the glass doors.

Close front build plate clamps

Plug-In and Power On!

01

Connect the power cable to the power socket at the back of the Ultimaker S5.

02

Plug the other side of the cable into a wall outlet.

03

Turn on the power switch near the power connection on the printer.


A World of Resources Available to You

Whether you are new to 3D printing or an expert with years under your belt, you can never have too many resources. View our full support and resource section for various OEM’s here.


Next Steps

Loading filament

Before you can start printing on the Ultimaker S3/S5, you need to load materials into the printer. For the first use, it is recommended to use the spools of Tough PLA and PVA that come with the Ultimaker S3/S5.

Model Preparation and Slicing

Cura and other slicing programs transform a CAD model (STL, OBJ, 3MF) into a set of machine instructions that tell your printer how to create your model.

Removing Prints

After your print has completed, it will need to removed from the glass build plate. There are a few separate techniques to accomplish this, and each can have advantages depending on the specific part and whether any additional adhesives were used.

Categories
3D Printing

Ultimaker Error Codes and Solutions

Your Ultimaker printer has multiple sensors and safety features built in to help ensure your printer is operating correctly and safely. This page will show the common error codes along with links to guides on how to resolve the situation.

Ultimaker S Series Error Codes

Categories
3D Printing

Ultimaker S-Line Maintenance Recommendations

Maintenance Schedule

To keep your Ultimaker S-line printer in optimal condition, the following maintenance schedule is recommended and is based on an expected 1,500 printing hours per year. If you are printing more or less hours in a year, adjust your maintenance schedule accordingly.

Click on a link for directions on how to perform that specific piece of maintenance.


Categories
3D Printing

Slicing A Model File With Cura

General Overview

Cura and other slicing programs transform a CAD model (STL, OBJ, 3MF) into a set of machine instructions that tell your printer how to create your model. There are hundreds of settings that you can control within Cura. Everything from layer height, speed, fan settings, acceleration, jerk etc. Cura comes with pre-made profiles for ease of use and to ensure quality, and it is highly recommended starting with these for all of your prints.

In this support article, we will cover everything you need to know in order to get a print up and running using Ultimakers Cura Software.


Download and Install

Cura is available for Windows, Mac OSX, and Linux operating systems. Ultimaker updates Cura on a regular basis, so be sure to check back for the latest free updates. You can find the most recent version available for download here. After installing the program appropriate for your Operating System, launch the program to prepare your file.


Machine Addition and Selection

After launching the program, you will be prompted to select a machine. In this walkthrough, we will be using the Ultimaker S5. If you are using another Ultimaker product, please ensure to select that machine that corresponds with your product.

Should you ever need to add a new machine for slicing, you can gain access to this same menu by going to the top menu of Cura and going to settings > printer > add printer.


Print cores are compatible with specific material combinations, and it is important to have these properly selected each time you slice a model file.

At the top of the main Cura prepare screen, you will see which current materials and print cores you have selected. Clicking the drop-down arrow on the right hand side will allow you to change the cores as desired.

NOTE: If you have an incompatible material with your print core, a red box will appear and prevent you from slicing your file.


Loading Model and Print Orientation

You can load your print model in one of three ways:

  • In the top left corner, go to File > Open File(s) > Select Model File.
  • In the top left, you will see an “Open File” icon.
  • You can drag and drop your model file onto the build platform representation.

After your model has been loaded onto the platform, you will want to consider how to position it for ideal printing. In general, you will want a flat surface on the build plate to help with adhesion whenever possible.


Quick Profile Options

When first starting with your 3D printing journey, you will want to remain within the recommended settings as provided within Cura. These settings will help ensure reliability and quality for the vast majority of models you will print.

  • The Profiles section will allow you to set layer height based upon different factors such as visual look, engineering quality, or draft settings.
  • The Infill (%) section will allow you to determine how solid your model file is. 10-20% is perfectly fine for most non-load-bearing components.
  • Gradual Infill option will print your object with less infill lower down in the model and increase as the object prints to help support the upper skin of the print.
  • Support generates support structures to help your object print overhangs and steep angles. A general rule of thumb is your printer will not require supports if your model is between 45 and 90 degrees of the build plate.
  • Adhesion is turned on by default for most profiles and helps secure your object to the build plate. It does this by increasing your objects footprint, by printing lines around the base of your object.

Generate and Print Your File

After you have your model positioned and changed any settings you desire for your application, it is time to generate the print file and get it to your printer. The process of generating your machine directions is called “slicing” as it cuts your model into slices to generate the code.

Slicing Your Model File

  • Automatic Slicing can be enabled through Preferences > Configure Cura > Enable Automatic Slicing. When enabled, Cura will automatically begin to slice your model after each setting change. This can be an intensive load on your computer and is recommended to disable this for older computers.
  • When “Enable Automatic Slicing” is disabled, Cura will wait to generate your file until you select “Slice” from the lower right-hand corner.

Printing Your File

Ultimaker provides a direct printing option via USB or allows you to send your print file over the network.

  • Printing via USB will require you to save your print file to the piece of hardware, and manually insert it into your printer. Once inserted, you will be able to select and start your print file from the user interface on your printer.
  • Printing over network requires you to sign into your Cura connect account, and you can then send the print file directly to your machine. This can then be started through the user interface on the panel or through Cura connect interface within Cura.
Categories
3D Printing

Loading Filament Into Ultimaker S3/S5

Determine

Before you can start printing on the Ultimaker S3/S5, you need to load materials into the printer. For the first use, it is recommended to use the spools of Tough PLA and PVA that come with the Ultimaker S3/S5.


Load Material 2

01

Place the spool with material 2 (PVA) onto the spool holder and select Confirm. Make sure the end of the material points in a clockwise direction, so that the material can enter feeder 2 from the bottom

02

Wait until the Ultimaker S5 detects the material and Confirm

03

Insert the end of the material into feeder 2 and gently push it until the feeder grips it and the material is visible in the Bowden tube. Select Confirm to continue

04

Wait for the Ultimaker S5 to heat up print core 2 and load the material into the print head

05

Confirm when the new material extrudes consistently from print core 2

06

Wait a moment for print core 2 to cool down

Mount material spool for extruder 2 first
Insert material into feeder 2

Load Material 1

Material 1 will be put on the material guide first before placing it on the spool holder in order to avoid any tangling of the 2 materials during printing. Select material 1 from the list on the touchscreen, select Start, and follow the steps below.

01

Take the material guide and hold it with the outer part towards you

02

Place the material spool with material 1 (Tough PLA) on the material guide with the material in a counter-clockwise direction, and guide the end of the material through the hole in the material guide

03

Place the material guide with material 1 on it onto the spool holder behind material 2, and select Confirm

04

Wait until the Ultimaker S5 detects the material and select Confirm

05

Insert the end of the material into feeder 1 and gently push it until the feeder grips it and the material is visible in the Bowden tube. Select Confirm to continue

06

Wait for the Ultimaker S5 to heat up print core 1 and to load the material into the print head

07

Confirm when the new material extrudes consistently from print core 1

08

Wait a moment for print core 1 to cool down

Prepare the reel for installation

Route the filament through the guide

Mount the filament reel

Guide filament into the feeder
Categories
3D Printing

Material Station and Air Manager Installation

Material Station Installation

Mount the Ultimaker S5 to the Material Station

01

Carefully place the Ultimaker S5 on top of the Material Station

02

Insert a tube coupling collet in the bottom of each feeder of the Ultimaker S5

03

Insert the left Bowden tube of the Material Station into the left feeder, and the right Bowden tube into the right feeder

04

Secure the Bowden tubes with clamp clips

05

Place the spool holder cap into the hole of the Ultimaker S5’s spool holder


Air Manager Installation

Mount the Air Manager on the Ultimaker S5

01

Align the mounting bracket with the back of the Ultimaker S5

02

Guide the Bowden tubes and print head cable into both mounting bracket slots. Above feeder 2, make sure that the Bowden tube is placed in front of the print head cable

03

Gently push down on the mounting bracket until it clicks firmly into place

04

Align the bottom of the filter housing with the slots in the mounting bracket and push it into place

05

Gently push the filter completely into the filter housing

06

From the front of the printer, place the cover over the filter housing

07

Align the hinges with the mounting bracket and drop the cover into place


Plugin the connectors

01

Connect the Air Manager cable to the port at the back of the Air Manager

02

mounting bracket around the Air Manager cable and close it

03

Slide the stress relief clip upwards until it cannot go further to secure the cable in place

04

Connect the other side of the Air Manager cable to the UMB OUT port on the Material Station

05

Connect the Material Station cable to the UMB IN port on the Material Station and the other end to the UMB OUT port on the Ultimaker S5

06

Connect the power extension cable to the Ultimaker S5 and the Material Station

07

Connect the power cable to the Material Station and the other end to a power outlet

Proper cable and PTFE routing
Categories
3D Printing

Removing Prints From Ultimaker

Print Removal Techniques

After your print has completed, it will need to removed from the glass build plate. There are a few separate techniques to accomplish this, and each can have advantages depending on the specific part and whether any additional adhesives were used.


Wait For the Glass Plate to Cool Down

If you printed directly on to the glass plate without using an adhesive, and if the build plate was not leveled too tightly, the print may easily be removed once it is cool. Simply allow the build plate and the print to cool down after printing. The material will contract as it cools and you can easily remove the print from the build plate.


Use a Spatula or Scraper

If your print doesn’t remove from the build plate after cooling, you can use a spatula to remove the print. Place the spatula under the print and apply a small amount of force to remove the print.

NOTE: Take the glass plate out of the printer to avoid damaging the build plate clamps.


Use Water to Remove the Print

If neither of these methods work, remove the print using water. Remove the glass plate and print from the Ultimaker. Be careful not to burn your fingers if the glass plate is still warm. Run cool tap water on the backside of the plate to cool it quicker – the print material will contract more than during a normal cool down. Once the plate has cooled, the print can be popped off.

If glue or Magigoo was used on the glass plate, run lukewarm water over the print side of the plate to dissolve the glue. Once the glue has dissolved, it should be easier to remove the print. If PVA was used, place the glass plate and print in water to dissolve the PVA – this makes print removal easier.