Categories
3D Printing

Removing Prints From Ultimaker

Print Removal Techniques

After your print has completed, it will need to removed from the glass build plate. There are a few separate techniques to accomplish this, and each can have advantages depending on the specific part and whether any additional adhesives were used.


Wait For the Glass Plate to Cool Down

If you printed directly on to the glass plate without using an adhesive, and if the build plate was not leveled too tightly, the print may easily be removed once it is cool. Simply allow the build plate and the print to cool down after printing. The material will contract as it cools and you can easily remove the print from the build plate.


Use a Spatula or Scraper

If your print doesn’t remove from the build plate after cooling, you can use a spatula to remove the print. Place the spatula under the print and apply a small amount of force to remove the print.

NOTE: Take the glass plate out of the printer to avoid damaging the build plate clamps.


Use Water to Remove the Print

If neither of these methods work, remove the print using water. Remove the glass plate and print from the Ultimaker. Be careful not to burn your fingers if the glass plate is still warm. Run cool tap water on the backside of the plate to cool it quicker – the print material will contract more than during a normal cool down. Once the plate has cooled, the print can be popped off.

If glue or Magigoo was used on the glass plate, run lukewarm water over the print side of the plate to dissolve the glue. Once the glue has dissolved, it should be easier to remove the print. If PVA was used, place the glass plate and print in water to dissolve the PVA – this makes print removal easier.

Categories
3D Printing

Particle Emissions During 3D Printing

What are Volatile Organic Compounds?

Volatile organic compounds (VOCs) are natural or synthetic airborne chemicals with a vapor pressure above 0.1 kPa at 20 °C. While they are often detectable as smells or odors, scientific detection takes place by sampling air around a printer under controlled conditions and then analyzing the samples. Some VOCs are hazardous. But depending on the molecular structure of the VOC, its safe Threshold Limit Values (TLV) concentration can range from a few micrograms to several milligrams per cubic meter.

Are 3D Printed VOC Emissions Dangerous?

The key to stating whether 3D printing may be harmful to your health depends on safe TLVs. These limit values essentially measure the concentration of ultrafine particles (UFPs) in the air. The fewer particles in the air, the better the health outcome for the user. There are seven key factors to take into consideration when assessing health risks from 3D printing:

  • The room’s dimensional volume affects the TLV. Larger rooms have more air volume and will result in a lower concentration of UFPs.
  • The room’s air exchange rate affects concentration buildup. Faster/more frequent air exchange cycles of the room’s dimensional volume will reduce the UFP concentration.
  • How many 3D printers you are operating. Each printer will generate UFPs, and therefore more printers will produce more UFPs.
  • What material(s) you are printing. Different materials produce different levels of UFPs during normal operation of a printer.
  • How long you are printing. The longer you are printing, the more time UFPs have to accumulate in the room.
  • How close you are to the printer(s). The closer you are to a source of UFPs, the more concentrated they will be.
  • Whether there are other emission sources in the room. Additional emission sources can affect overall room air quality in addition to UFPs from 3D printing.

To dispel any concerns, if you 3D print under the recommended conditions, using any Ultimaker 3D printer and Ultimaker material, there is minimal concern for health risks. For current Ultimaker materials, a nano reference value of 40,000 particles per cubic centimeter (p/cm3) is relevant. Below this concentration, health risks are very unlikely.

This chart provides three average UFP concentration readings for three different print materials. These represent the low, mid, and high end range of possible particulate emissions when using an Ultimaker S5 with the standard configuration that does not include an Air Manager. Specifically, this is due to the level of UFP emission during printing for materials ranging from the low end (PLA) to the high end (Polycarbonate).

Image

* Calculated based on the particle emission rate determined from independent test laboratory measurements and assuming a typical office room of 30.6 m3 with an air exchange rate of 1.8/hr

How Do I Mitigate 3D Printed Emissions?

While it is not possible to eliminate VOC emissions entirely while 3D printing, there are steps you can take to mitigate the particulates released into the local environment.

This chart shows the particulate emissions from the same three materials and printers, along with a second reading taken an Ultimaker Air Manager system has been installed on the printer. For each material, the particle emissions have dropped to less than 500 particles per cubic centimeter. In the case of Ultimaker Polycarbonate, this has reduced overall emissions by more than 95%.

The Air Manager uses a quiet, multi-speed fan to pull air contained inside the enclosed build chamber through a filter, creating an inside-out airflow. This results in nearly all air leaving the printer through the filter, with the exhausted air having the majority of particles removed.

Image

* Calculated based on the particle emission rate determined from independent test laboratory measurements and assuming a typical office room of 30.6 m3 with an air exchange rate of 1.8/hr

Image

Download the Full VOC Emissions Paper

Get the full case study, which details the process used by Ultimaker to determine VOC emissions from their printers and materials.

Final Thoughts

An Air Manager fully encloses the Ultimaker S5 build chamber, providing users with the freedom to set up 3D printers in more locations – including areas where unwanted airflows would negatively impact print quality. Additionally, by providing a physical barrier that stops anyone from touching hot or moving parts, workplace safety is improved. Though it’s up to each individual user to assess the safety of their printing environment and make proper adjustments, adding an Air Manager or filtration solution to your setup mitigates risk substantially, while also improving overall print quality by providing a more consistent print environment.

Image

The Ultimaker 2+ Connect Air Manager (including front door enclosure) fully encloses the build chamber for a more stable printing environment, while preventing anyone from touching hot and moving components during operation.

Image

An integrated filtration solution for the Ultimaker S5 printer, utilizing HEPA filtration while providing optimized airflow settings for all Ultimaker filament. Incorporate safety in your 3D printing workflow.

Image

The 3D PrintPRO extraction system combines high capture performance with proven filter technology, ensuring the effective removal of hazardous particulate, gases/vapors, and odors associated with 3D printing methods. Requires an additional compatible print enclosure for proper operation.

Considering 3D Printing?

Dynamism works with thousands of schools, companies,
and government organizations. We understand the challenges
with acquiring and deploying cutting-edge technology.

Just getting started? Know what you’re looking for? We’re ready
to discuss requirements and help you make an informed decision
about the products you need, all at the best prices available.

Categories
3D Printing

Higher EDU Makerspaces

Categories
3D Printing

Is SLS Printing Right for Your Organization?

Selective Laser Sintering (SLS) is a 3D printing process that’s currently trusted by engineers and manufacturers across many different industries for its capability in producing strong, functional parts. Due to the ability to densely pack parts within the build volume, as well as the self-supporting nature of the process removing the need for support structures, it’s especially suited for low-volume production. While SLS was traditionally an expensive process with a high initial investment cost, prices have recently dropped significantly, while still delivering quality parts quickly.

However, this approach is not by default suited to all applications. There are significant considerations that must be taken into account when working with powder-based systems, and these can often require additional facilities investment and safety precautions. The variety of available printing materials with SLS may be more limited compared to other 3D printing processes. Parts will also have a textured surface finish that may not be desirable for certain functions

It’s important to fully assess all necessary factors when determining whether or not SLS printing is the right fit for your organization. But this does not need to be a daunting task, and we’re here to help! Download the Guide to SLS 3D Printing for a detailed overview, and don’t hesitate to reach out to our 3D printing experts with any additional questions.

Guide to Selective Laser Sintering (SLS) 3D Printing

Selective Laser Sintering is an Additive Manufacturing (AM) technology that uses a high-power laser to sinter small particles of polymer powder into a solid structure. Grab your white paper now to discover:

  • The Selective Laser Sintering process
  • When to use SLS over other additive methods
  • Specific material properties and strengths
  • More…

Image

An SLS printer for low-volume production with great material properties that produces isotropic parts. Create engineering quality parts with production capacity to rival injection molding.

Image

The Fuse 1 and Fuse Sift bring the industrial power of Selective Laser Sintering (SLS) to your benchtop, providing prototyping and production at one tenth of the cost of existing SLS machines.

Image

Want to scale up your production without bringing new hardware in-house? We have the expertise to help! Contact our digital manufacturing team to get your parts made quickly and efficiently.

Categories
3D Printing

SmartSlice for Cura On-Demand Webinar

In this 45 minute product demonstration with Dynamism and Teton Simulation, we review how the SmartSlice plugin for Ultimaker Cura enables users to:

  • Define load characteristics on parts and preview how loads will impact a printed part.
  • Implement simulation using Finite Element Analysis to ensure printed part performance.
  • Choose from multiple slicing configurations, allowing users to prioritize based on individual needs.
  • Reduce print times by up 45% while saving up to 40% on material usage.
  • Have confidence that printed parts will meet application requirements in specific project scenarios, reducing the overall number of iterations.

Watch the Free Webinar Below!

Want to give SmartSlice a try? Request a free trial.

“Teton’s Smart Slice plugin brings engineering grade part simulation to Ultimaker Cura users. Using the integration options of our open and pluggable platform it will make sure parts still meet their engineering criteria, but need less material and therefore saving valuable time and costs. The cooperation with Teton and the integration of their innovative solution are a prime example of how we will be continuously adding value for our professional customers.” Paul Heijmans – Senior VP Software at Ultimaker.

Image

SmartSlice is a plug-in for Ultimaker Cura that empowers users to perform validation and optimization of print parameters based on end-use requirements

Image

Professional and reliable composite-ready 3D printing from Ultimaker, in an efficient and accessible desktop format. Packed with the latest technology, it is as easy to use as it is powerful.

Image

The Ultimaker S5 is an easy-to-use desktop 3D printer with a large build volume that delivers accurate, industrial-grade parts, time and time again.

Categories
3D Printing

Fuse 1+30W vs Lisa Pro 3D Printer Comparison

Formlabs Fuse 1+30W

Formlabs Fuse 1+30W

Designed for maximum output and minimum waste, Fuse 1+ 30W is a compact SLS 3D printer that packs an industrial punch. Unlock unprecedented print speeds, a full range of materials, and a convenient, intuitive workflow to deliver truly rapid prototyping and production in-house.

Sinterit Lisa Pro

Sinterit Lisa Pro

Another one of the market’s most affordable SLS options, the Lisa Pro provides a wider range of materials but at the cost of max 3.5″ (PA12/11) and 4.3″ (TPE/TPU) build volume in one direction and more involved workflow.

The Basics

Formlabs Fuse 1+30W
Sinterit Lisa Pro

USA

Country Designed In

Poland

165 x 165 x 300 mm
6.5 x 6.5 x 11.8 in

Build Volume
Length x Width x Height

PA: 90 x 130 x 230 mm
TPE/TPU: 110 x 150 x 245 mm

Nylon 12 / Nylon 11 /

Nylon 12 GF (glass-filled) /

Nylon 11 CF (carbon-filled) /

TPU*

Available Materials
*More materials to come.

Nylon / TPE / TPU

$100+/kg

Material Price

$140+/kg

20 – 50 %

Material Refresh Rate
Amount of new powder added with reclaimed powder every cycle.

20 – 50 %

< 60 minutes

Warmup Time
Time it takes for the build volume to head up before printing begins.

60-90 minutes

110 µm

Minimum Layer Height

75 µm

Ethernet, Wifi, USB

Connectivity

Ethernet, Wifi, USB

$24,999 ~ $40,000 for the complete workflow package

Starting Price

$18,990 ~ $40,000 for the complete workflow package

Hardware Breakdown

Fuse 1+30W

The Fuse 1+30W and Sift provide an easy-to-use, end-to-end solution for medium-large single parts or short-run production. A 6.5 x 6.5 x 11.8″ build volume enables users to pack a lot of parts in a small volume. The enclosed system with transferrable build chamber and combined cleaning/sifting/mixing station provides a seamless and clean workflow. In addition, a second build volume can be added to your rotation for minimal downtime between prints.

Lisa Pro

The Lisa Pro provides an affordable SLS 3D printing solution with wider range of materials, but with a few sacrifices. First, a maximum 3.5″ build volume in one direction when printing Nylons, a material used in SLS, limits the printer to smaller objects and smaller production runs. Next, a more involved workflow will have you transferring, scooping, measuring, pouring, and brushing volatile powders in open-air environments at several points in the process.

Materials

Out of the gate, the Fuse 1+30W only prints a customized PA12, with more materials in development. That said, PA12 accounts for 90-95% of all SLS printing and has exceptional material properties. This includes biocompatibility, great heat deflection, and resistance to UV, moisture, and solvents.

The Lisa Pro is equipped with an optional nitrogen filled chamber, which helps to print their wider range of materials. Material options includes PA11, PA12, and TPE/TPUs in varying colors.

2021 Edition

Professional 3D Printer Buyers Guide

Choosing the right 3D printer doesn’t have to be difficult. Find the perfect printer for your application. This in-depth guide covers pricing, materials, dimensional accuracy, and more.

Get Help From A 3D Printing Specialist

Categories
3D Printing

Desktop Metal to acquire EnvisionTEC

Announced today, two 3D printing powerhouses are to join forces with a definitive agreement for Desktop Metal to acquire EnvisionTEC, a market leader in photopolymer printing with an incredible IP and product portfolio. The acquisition will add a large portfolio of photopolymer 3D printers for end-use parts, dental and orthodontic applications, bioprinting, and casting markets such as jewelry. Dynamism is an authorized reseller of both brands, discover their available 3D printing solutions here.

In the industrial additive manufacturing market, growth has been driven by a shift from purely prototyping to dedicated solutions for end-use applications, an area where EnvisionTEC excels. Founded in 2002, EnvisionTEC boasts a large portfolio of over 190 materials and seven current 3D printers, which come in a variety of industry-focused configurations. Of notable mention, a recent material addition, EnvisionTEC’s E-3955 Thermal Cure exceeds material properties of Ultem1010, the strongest material currently available for material extrusion 3D printers (FFF/FDM). In addition, the EnvisionTEC portfolio includes a massive, high-speed 3D printer powered by an 8k DLP light source, printers 100X faster than legacy thermoplastic printers, a bioprinter, and several industry leading solutions for dental, jewelry, and manufacturing applications.

Image
A complete look at the combined Desktop Metal and EnvisionTEC hardware portfolio

Through the acquisition expect “business as usual” for both companies.  EnvisionTEC will continue as a wholly-owned subsidiary, maintaining the current organizational structure, with founder Al Siblani remaining as CEO, and the EnvisionTEC sales organization and channel program remaining in place.

Dynamism is an authorized reseller of both Desktop Metal and EnvisionTEC

Discover solutions from each company by clicking the logos below or reach out to sales@dynamism.com with your additive needs. Our dedicated industrial 3D printing specialist can work with you to discover how these complementary product lines can help your company with the digital manufacturing transformation.

DISCOVER SOLUTIONS

Image
Image
Categories
3D Printing

Understanding 3D Printer Resolution

When you begin researching 3D printers one question often comes to mind: “What is the resolution of this 3D printer?” This is not an easy question to answer and has certainly led to failed expectations for the unsuspecting. So, before you let ‘resolution’ sway your next 3D printer purchase, let’s take a moment to define 3D printer resolution and some common misconceptions of the metric.

Just because a 3D printer data-sheet boasts a 1.25μ X/Y/Z resolution does not mean you can expect this from the finished part, nor does it guarantee a smooth surface finish.

What Is 3D Printing Resolution? It’s Not What You May Think.

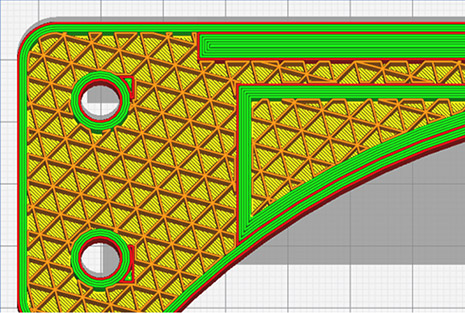
Due to a lack of metric standardization in additive manufacturing, 3D printer resolution can go by a number of names including X/Y/Z resolution, positioning resolution, or theoretical resolution. In theory, this metric is a measurement of the smallest movement a 3D printer can achieve in each direction. Set by hardware and firmware, positional resolution is calculated by the number of ‘steps’ in a 360° rotation. These micro rotational movements are delivered by stepper motors and belts to drive the X, Y, and Z axes. The more steps, the finer movements a 3D printer can achieve. While this is important, manufacturers often provide a theoretical metric, unrealized by the user due to a number of factors including material shrinkage, belt tensioning, nozzle size, and more.

What You’re Probably Looking For…

For people new to 3D printing and even some tenured professionals, resolution is often misconstrued for one of two things, dimensional accuracy of the printed part and/or surface finish. These are both complex topics so let’s take a moment to analyze each. Keep in mind there are pros and cons to each 3D printing technology so this article should only be part of your overall assessment. If you need help, Dynamism’s 3D printing specialists are here to help.

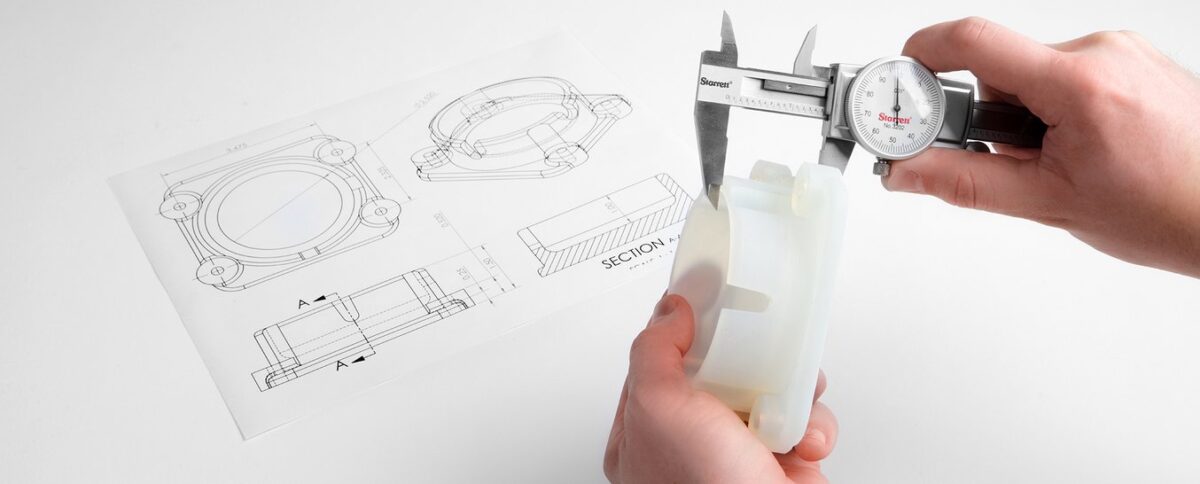
Printed Part Dimensional Accuracy

Printed part dimensional accuracy is not solely defined by hardware. Instead, there are a number of influencing factors for each of the 3D printing technologies. Below, we break down influencing factors for two of the most common technologies.

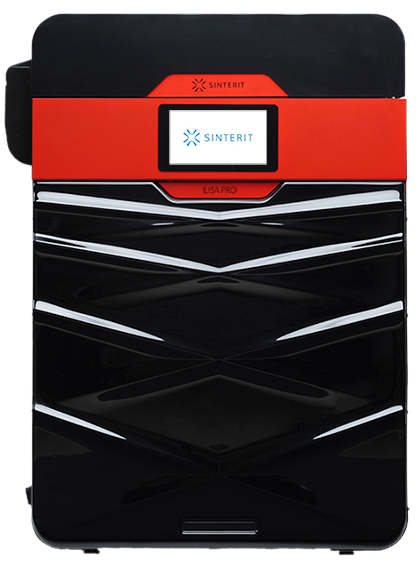
Material Extrusion 3D Printers

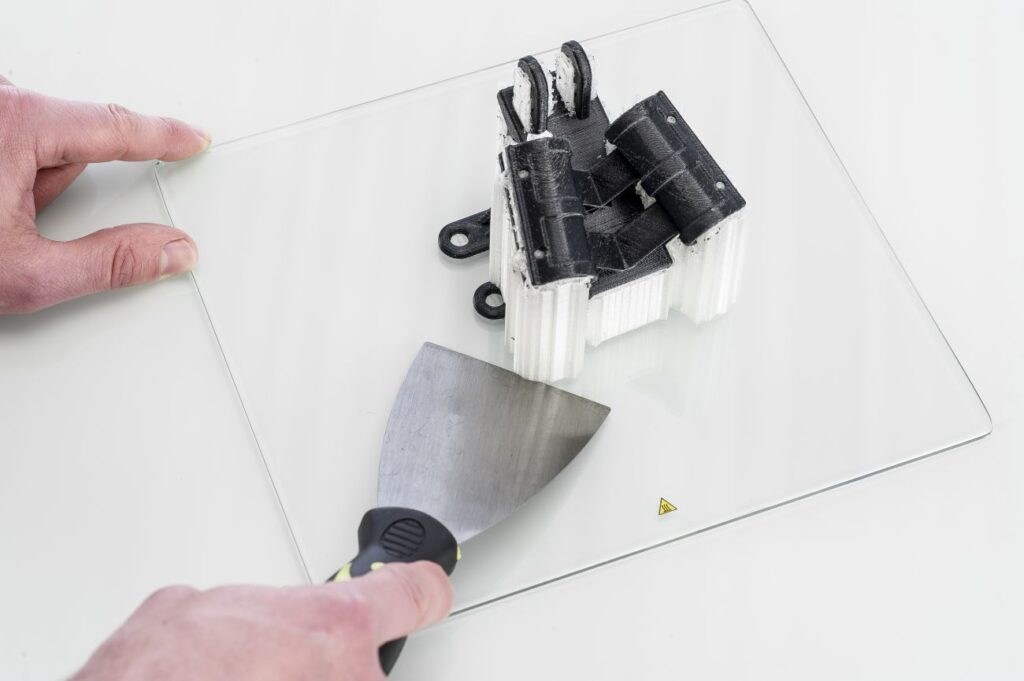
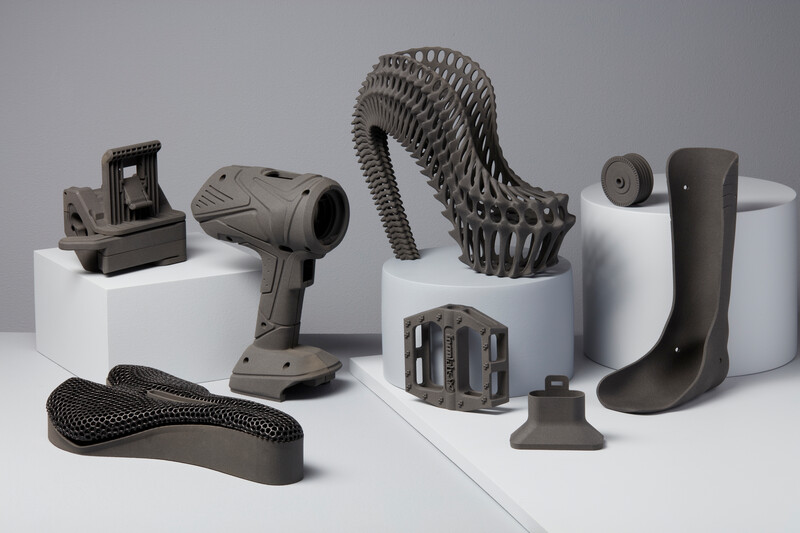
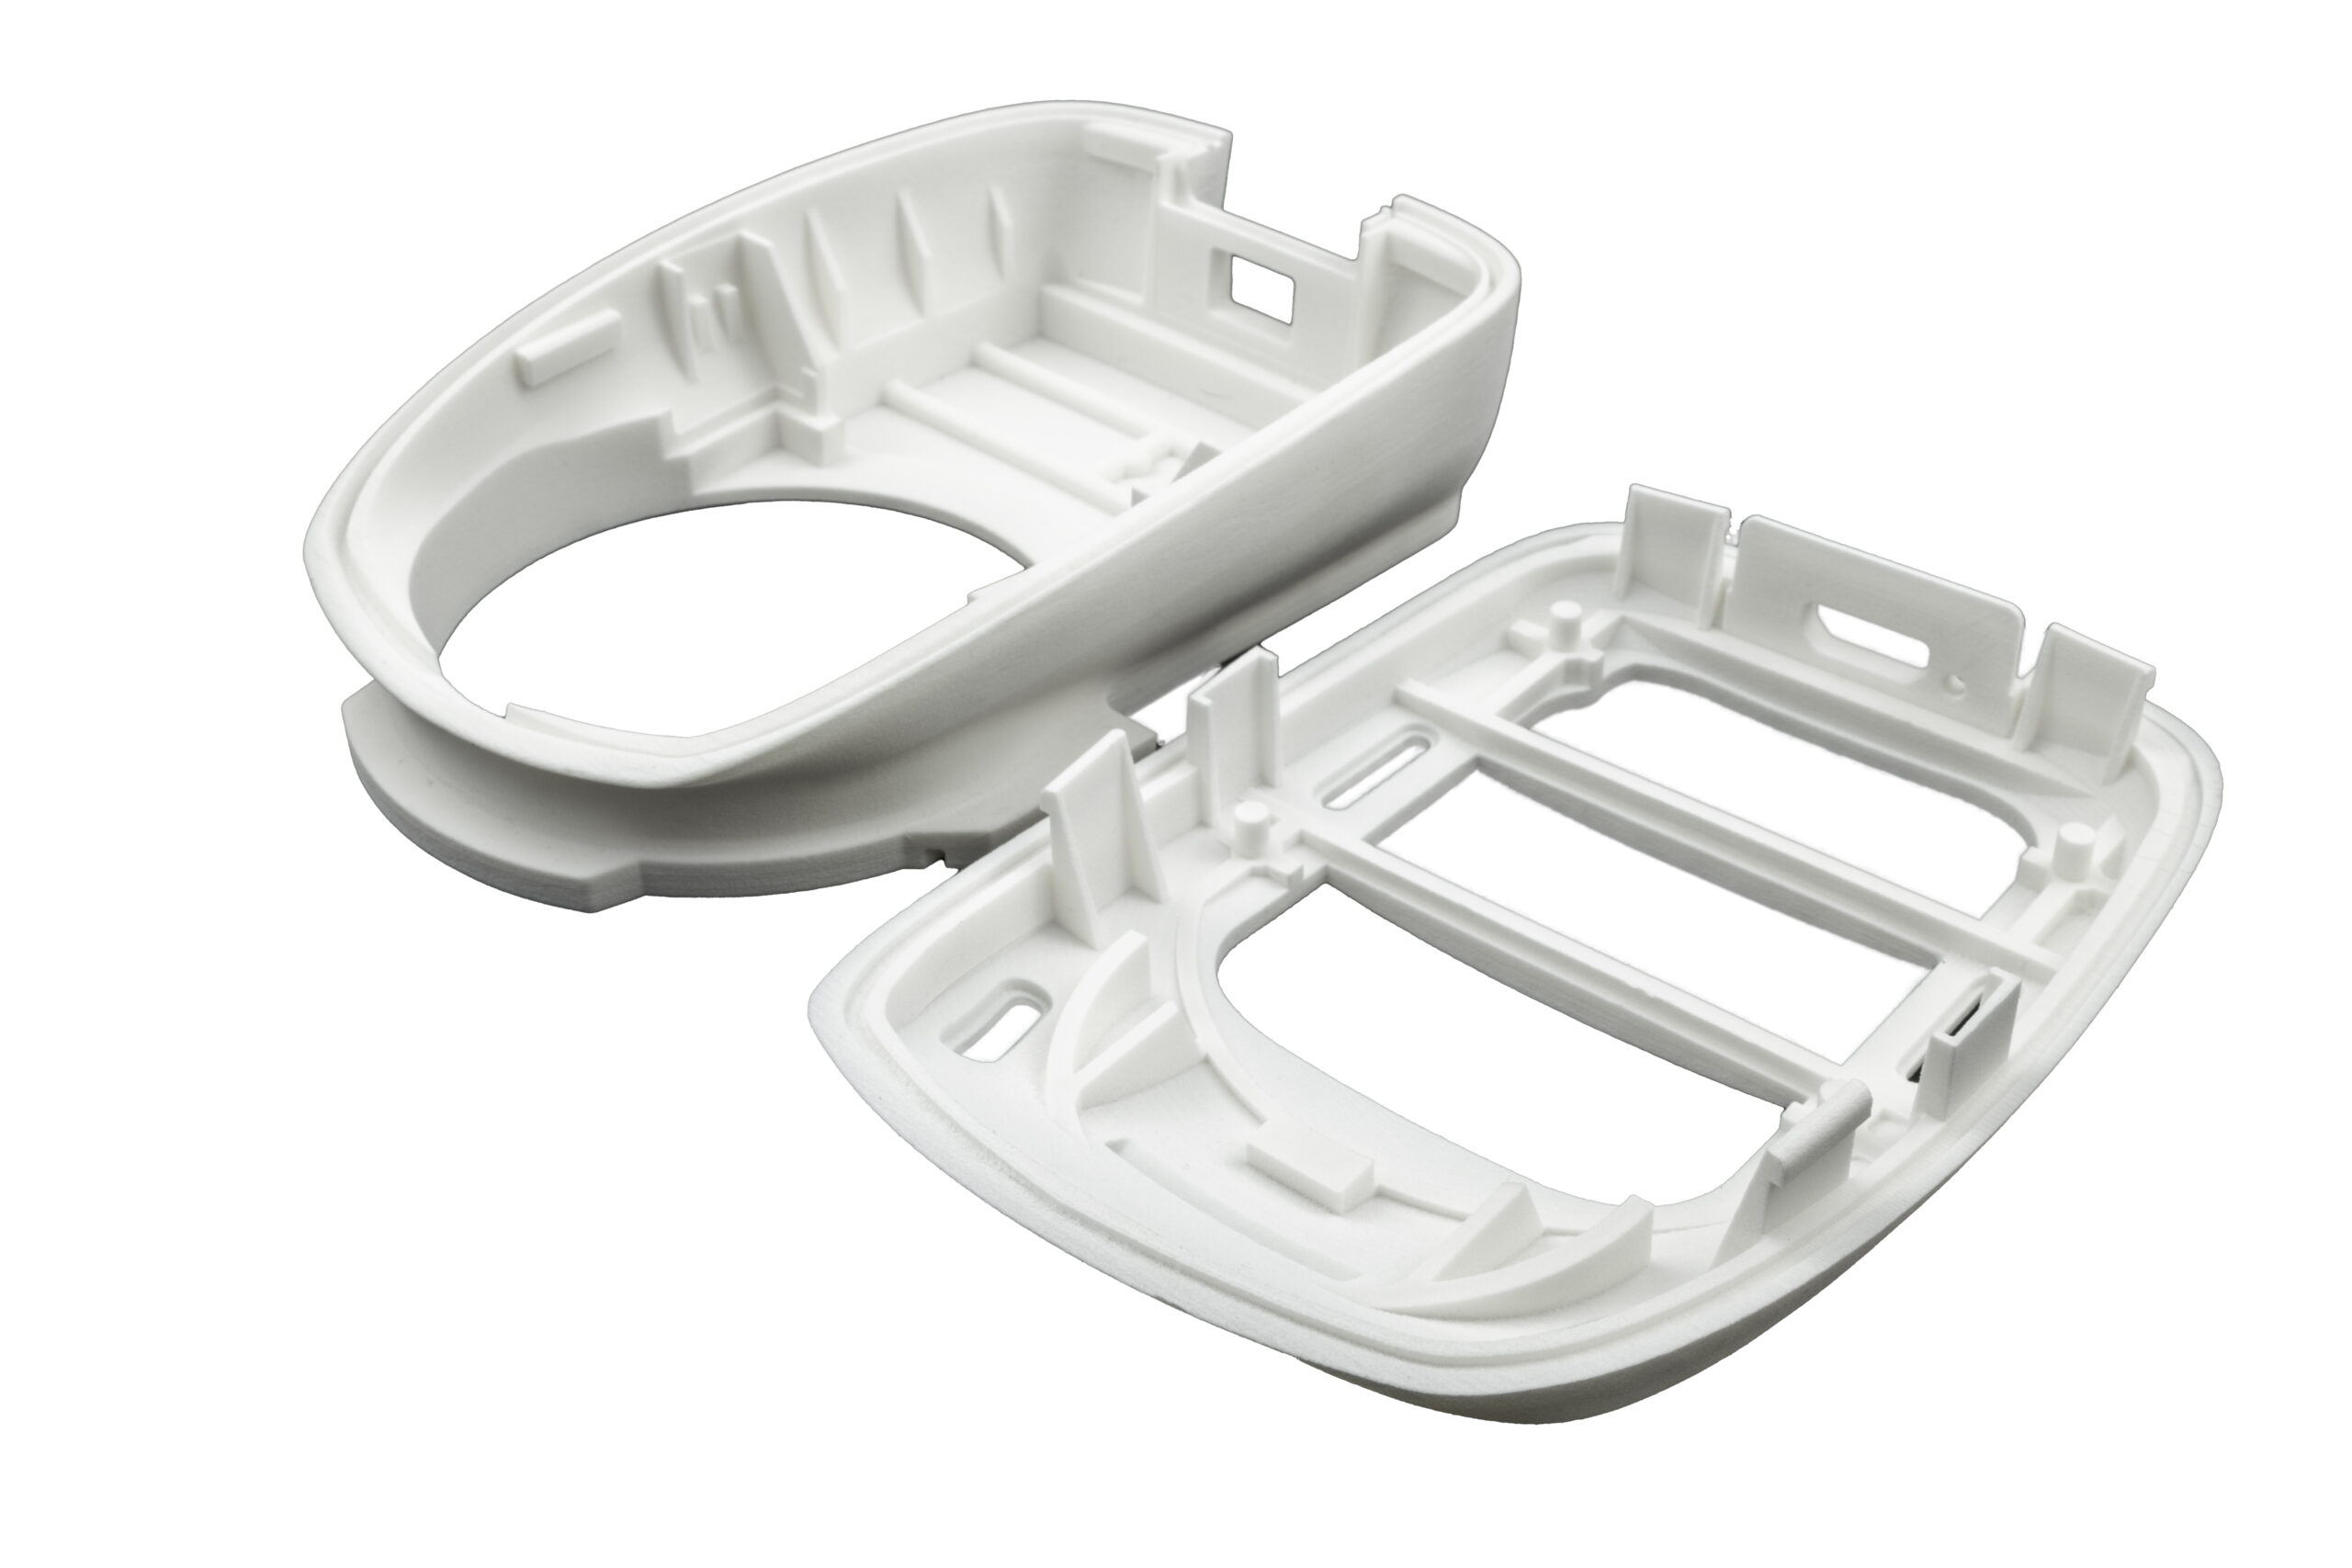
For material extrusion 3D printers, the dimensions of your final part are influenced by positional resolution, nozzle size, die swell, belt tensioning, and shrink rate of the material. Material is a huge contributing factor here. Some materials have more die swell than others. Additionally, Styrene-based materials, like ABS, have high shrink rates which can result in parts smaller than intended. Thankfully, smaller nozzles can be added to most FFF 3D printers to achieve more accurate prints and smoother surface finishes but as a tradeoff, prints take longer to finish.
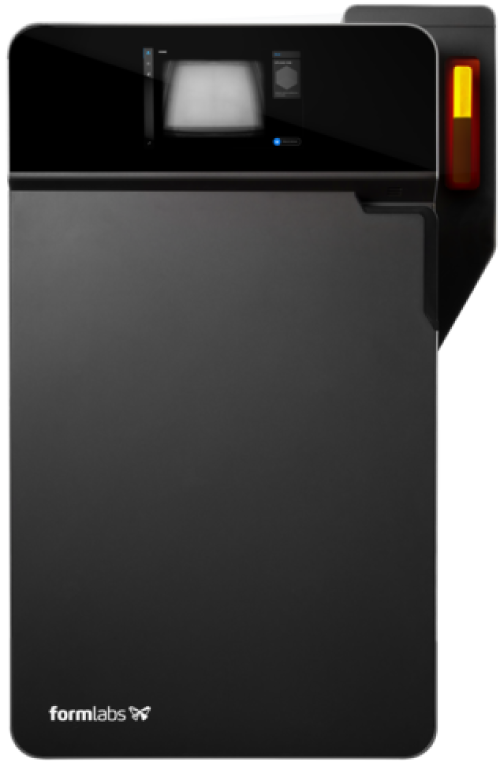
Resin 3D Printers

For stereolithography aka resin printers, dimensional accuracy is mainly determined by the material and laser spot size, or screen resolution for DLP 3D Printers. Some materials will shrink when undergoing the heat and UV curing process. Overall, SLA and DLP printers produce more accurate parts than material extrusion printers but as a tradeoff, most affordable market options have smaller build volumes and materials only emulate end-use materials, like ABS, Polycarbonates, and Polyamides. Exceptions do exist for build volume, like the Formlabs Form 3L and Nexa’s super fast NXE400.

Surface Finish

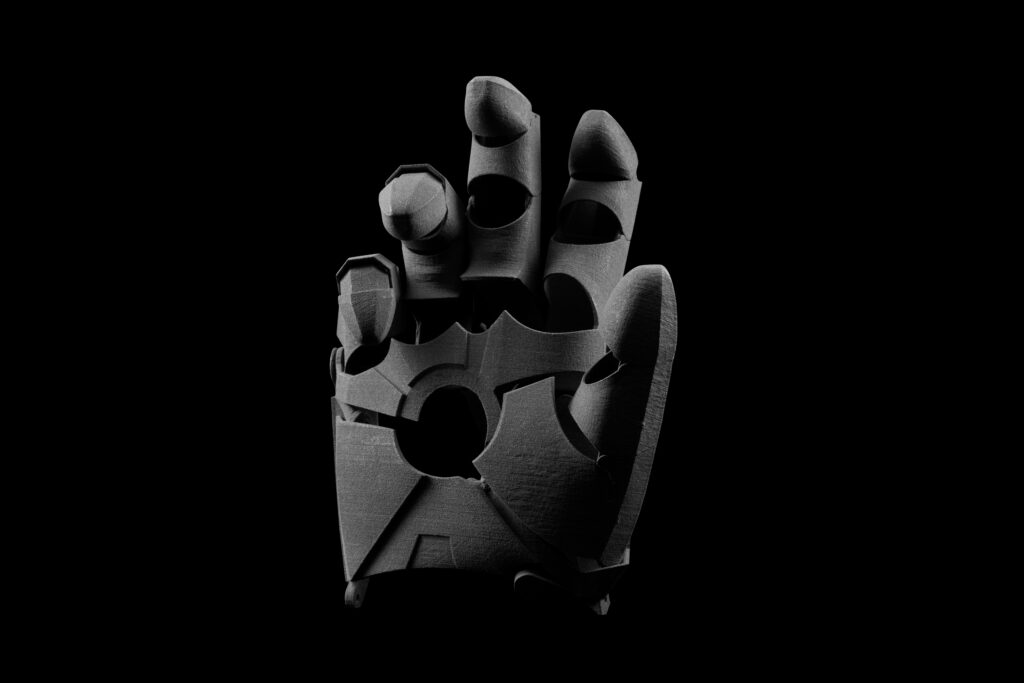
When looking for a smooth surface finish, SLA/DLP 3D printers provide exceptionally smooth finished prints. As mentioned above, the technology does come with some tradeoffs. For material extrusion printers, smoother surface finishes can be achieved with smaller nozzles and finer layers. Furthermore, some materials can be vapor smoothed, providing a surface finish that nears that of resin 3D printers.

Now That We’ve Settled That…

As you continue your 3D printer shopping journey, do not let 3D printer resolution sway your decision, as this metric is often theoretical and limited by other factors such as materials. If you need help selecting the right 3D printer, Dynamism’s 3D printing specialists are here to help. With a brand agnostic approach and large selection of technologies and brands, our goal is to get you the best possible solution for your application.

Categories
3D Printing

Ultimaker Printer Comparison

Ultimaker Printer Comparison Sheet

Renowned for their ease of use, large material selection, and seamless network connected workflow, Ultimaker defines professional desktop 3D printing. Get a side-by-side comparison of the Ultimaker 2+ Connect, S3, and S5 3D printers including:

  • Key features
  • Applications
  • Material compatibility
  • And more…
Categories
3D Printing Entertainment News

3D Printed Rainbow Road + Augmented Reality Mario Kart Wins The Internet

September 3rd, 2020 marked 35 years since Super Mario Bros’ first launched. To celebrate, Nintendo announced an innovative new augmented reality version of the beloved Mario Kart series, Mario Kart Live: Home Circuit. Utilizing a camera-equipped Kart synced to a Nintendo Switch, the game puts you directly in the driver’s seat, navigating whatever course you can devise around the home. The innovative game format has given rise to some pretty insane courses. One of notable mention, a 3D printed recreation of the classic SNES Rainbow Road course, more information below.

Created by Additive Manufacturing Specialist, Antonio Aranzana and a fleet of BCN3D 3D Printers, the roughly 17′ by 18′ course is comprised of 4,434 PLA pieces. The course was completed in just three short days on BCN3D’s new Sigma D25. A feat hard to match with other 3D printers, made possible by their innovative Independent Dual Extruder (IDEX) technology. The IDEX system utilizes two, independent extruders to offer mirror and duplication printing modes, cutting the production time to half that of other single head 3D printers.

Image
Designed for a 0.6mm nozzle, each tile can be printed in 9 minutes. Visit Thingiverse to find the design.

While creating a Mario Kart track may be fun and games, BCN3D’s IDEX system points to a growing trend as additive manufacturing transitions from simple prototyping to low-volume production, mass customization, and end-use parts. Click the button below to learn more about BCN3D’s 3D Printers.