Categories
3D Printing Engineering Manufacturing

Formlabs Fuse 1 On-Demand Webinar

Fuse 1 Product and Workflow Overview

Bring the industrial power of Selective Laser Sintering (SLS) into your workshop with an affordable, compact system for prototyping and production-ready nylon parts. The Fuse 1 and Fuse Sift deliver high-quality parts at as little as a tenth of the cost when compared to competing systems. In this on-demand webinar, we provide an overview of the Formlabs Fuse 1 system, along with detailing a number of applications. Watch now to learn more about:

  • How the Fuse 1 system provides high productivity and throughput, with minimal downtime
  • How Formlabs developed an approach for SLS 3D printing focused on simplifying powder management and delivering consistent parts
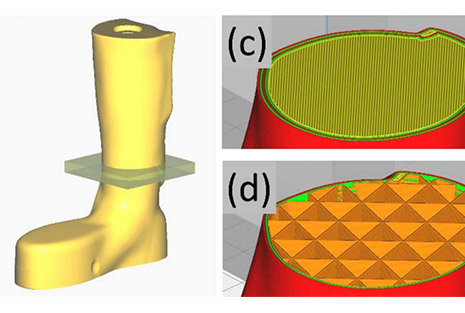
  • Potential applications for medical prosthetic devices and low batch production
  • More…

Fill out the form below to watch the webinar!
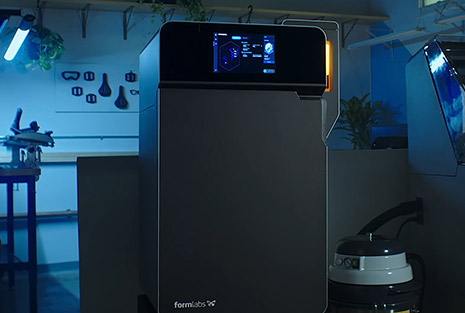
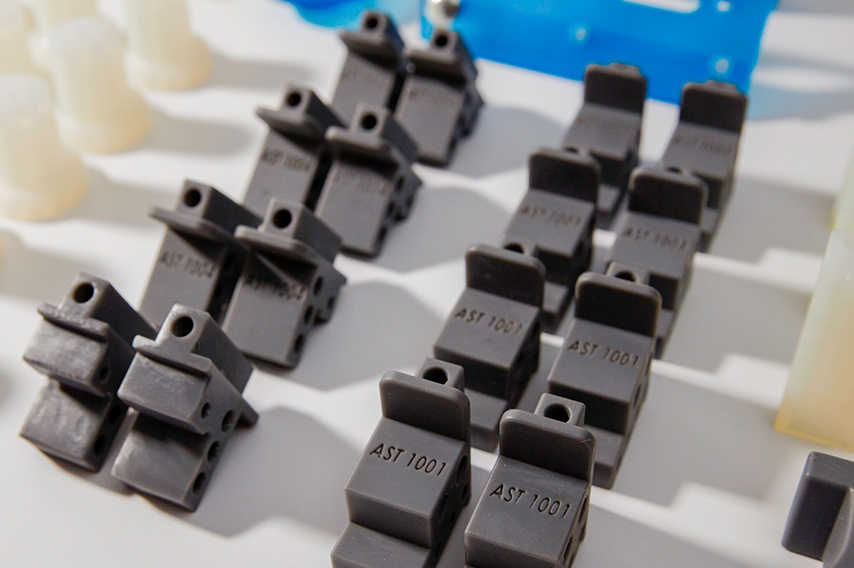
Image

The Fuse 1 brings the industrial power of Selective Laser Sintering (SLS) to your benchtop, providing prototyping and production at a tenth of the cost of existing SLS machines.
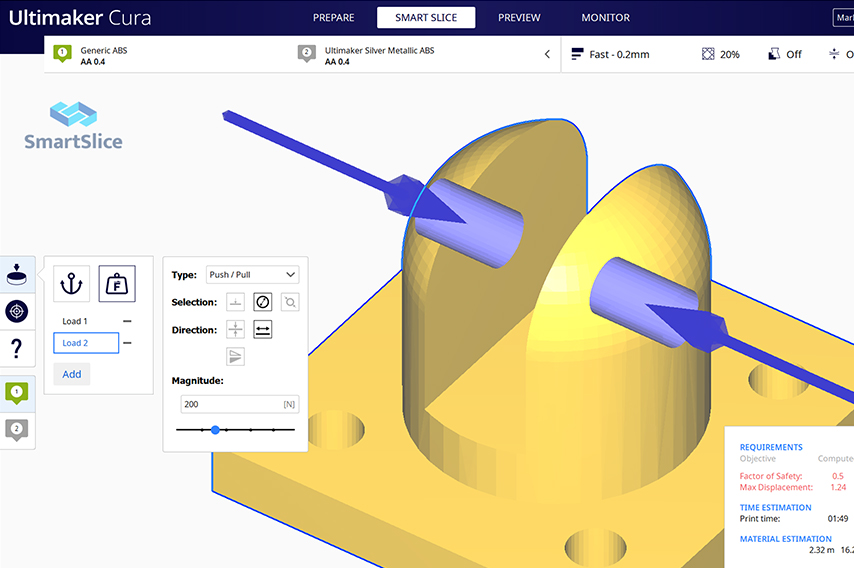
Image

SmartSlice is a plug-in for Ultimaker Cura that empowers users to perform validation and optimization of print parameters based on end-use requirements.

Image

Get fast, on-demand manufacturing and rapid prototyping. Dynamism’s online 3D printing service is fast, easy, and allows access to multiple printing technologies.

Categories
Healthcare Manufacturing

Optimized Orthopedic Aids Created With SmartSlice for Cura

Validate Service Performance Using Intelligent Software

By integrating SmartSlice for Cura software into their current production process, adViva was able to save print time and materials, while improving the overall strength of their final mold. This unique piece of software uses Finite Element Analysis to validate slicing settings and selected material, while simulating forces that a part will encounter during usage. Download the case study now to learn their process of custom prosthetic generation, which details how they were able to:

  • Increase throughput utilizing existing equipment
  • Save 50 days of print time throughout a year-long cycle
  • Reduce material usage by over 13 kilograms in a year
  • More…
Categories
3D Printing

Loading Filament On The Ultimaker 2+ Connect

Before you can start printing on the Ultimaker S3/S5, you need to load materials into the printer. For the first use, it is recommended to use the spools of  Tough PLA and PVA that come with the Ultimaker S3/S5.


Getting Started

Before you can start printing on the Ultimaker 2+ Connect, you need to load material into the printer. For the first use, it is recommended to use the spools of  Tough PLA that comes with the Ultimaker 2+ Connect.


Mount The Material Spool

01

Place the spool with the material on the spool holder. Make sure to put it with the material in a counter-clockwise direction, so that the material can enter the feeder from the bottom.

02

Wait for the Ultimaker 2+ to heat up the nozzle. This will ensure the material can flow through the nozzle while the printer feeds filament.


Insert Material Into Feeder

01

Insert the material into the feeder and gently push it until the material is grabbed by the feeder and is visible in the Bowden tube. Select confirm to continue.

02

Confirm when the new material extrudes from the nozzle.

Categories
3D Printing

Ultimaker 2+ Connect Unboxing and Setup

The Ultimaker 2+ Connect comes in reusable, durable packaging, specially designed to protect your 3D printer. Ensure you save your packaging, it will be required to send the machine in should it require warranty service and will ensure the safety of your machine when changing locations.


Follow the steps below to unpack your Ultimaker 2+ Connect:

01

Place the box on the ground.

02

Remove the plastic locking clips from the lower section of the box.

03

Holding the handles, lift the upper section of the box, and place it aside.

04

Take the quick start guide, safety and warranty information booklet, accessory box, and a spool of filament off the upper cardboard piece.

05

Remove the upper cardboard section and four foam pieces.

06

Carefully lift the Ultimaker 2+ Connect out of the bottom cardboard section and foam pieces.

07

Place the printer on a flat surface.


What Is Included With Your Printer

The Ultimaker 2+ Connect is supplied with several hardware accessories. Check if all these items are included before continuing:

Accessories
  • Glass plate
  • Spool holder
  • Power adapter and cable
  • Ethernet cable
  • USB stick
  • Calibration card
  • 0.4 mm nozzle
Consumables
  • PLA Silver Metallic 750 g
  • Glue stick
  • Oil
  • Grease
Tools
  • Hex screwdriver 2 mm
  • Hex key 2.5 mm
  • Nozzle wrench
  • Print head calibration aid
Documents
  • Quick start guide
  • Safety and warranty information

Get to Know Your Printer

Familiarize yourself with the different components of the Ultimaker 2+ Connect. Throughout our documentation, these terms will be used frequently.


Hardware Installation and Setup

01

Insert the spool holder into the back panel and push until it snaps into place.

Install spool holder
02

Open the front build plate clamps to insert the glass plate.

Open front build plate clamps
03

Slide the glass plate into the rear build plate clamps, then close the front clamps.

Install glass build plate
04

Connect the power cable to the printer with the flat side facing down and the other end to a power outlet.

Plug in printer

Categories
3D Printing

Ultimaker Support Resources

Categories
3D Printing

Ultimaker 2+ Connect Air Manager Installation

The Ultimaker 2+ Connect Air Manager gives you more confidence and setup flexibility. Designed to increase user safety, it removes up to 95% of ultrafine particles and shields users from hot and moving components. This is an excellent addition to any office or education-focused environment.


The Air Manager is delivered in separate components, which can be installed in a few easy steps.

01

Align the filter housing with the back of the Ultimaker 2+ Connect.

02

Guide the Bowden tube and print head cable into the slot.

03

Push down on the filter housing until it clicks firmly into place.

04

Gently push the filter completely into the filter housing, with the tab facing down.

05

Place the cover over the filter housing and align it with the top panel; ensure there are no gaps between the cover and the printer.

06

Connect the Air Manager cable to the port at the back of the Air Manager and ensure it is secure with the clip.

07

Guide the Air Manager cable around the left side of the spool holder.

08

Plug the cable into the OUT port at the back of the Ultimaker 2+ Connect.

09

Take the front enclosure and place the hinge profile on the front panel as shown.

10

Push the handle against the panel; the magnet will hold the front enclosure in place when closed.

The front enclosure must be installed when the Ultimaker 2+ Connect is printing. To remove the print, or for certain maintenance procedures, the front enclosure must be removed. This can be conveniently placed on the top of the printer, resting against the Air Manager cover.

Familiarize yourself with the different components of the Ultimaker 2+ Connect Air Manager. Throughout our documentation, these terms will be used frequently.

Categories
3D Printing

Ultimaker S3 / S5 Unboxing and Setup

The Ultimaker S3 and S5 come in reusable, durable packaging, specially designed to protect your 3D printer. Ensure you save your packaging, it will be required to send the machine in should it require warranty service and will ensure the safety of your machine when changing locations.


Follow the steps below to unpack your Ultimaker S3 / S5:


What Is Included With Your Printer

Accessories
  • Glass build plate
  • Spool holder with material guide
  • Power cable
  • Ethernet cable
  • USB stick
  • Print core AA 0.4
  • Print core BB 0.4
  • XY calibration sheet
  • Calibration card
  • Nozzle cover (3x)
Consumables
  • Tough PLA (750 g)
  • PVA (750 g)
  • Glue stick
  • Oil
  • Grease
Tools
  • Hex screwdriver 2 mm

Get to Know Your Printer

Familiarize yourself with the different components of the Ultimaker S5/S3. Throughout our documentation these terms will be used frequently.

1. Glass door(s)

2. Print head

3. Build plate

4. Build plate clamps

5. Touchscreen

6. USB port

7. Feeder 2

8. Bowden tubes

9. Feeder 1

10. Power socket and switch

11. Ethernet port

12. Double spoolholder with NFC cable

13. NFC socket


Hardware Setup Directions

Install the Bowden Tubes (Ultimaker S5 Only)

01

Remove the clamp clips from the print head.

Remove bowden clamp clip
02

Insert the Bowden tubes. The Bowden tubes connect to the corresponding numbers on the print head and feeder.

Install bowden tubes
03

Secure the Bowden tubes with the clamp clips.

Install bowden clamp clip
04

Fit the print head cable clips onto Bowden tube 2.

Attach bowden tube 2 to print head cable

Install and Connect the NFC Spool Holder

01

Insert the spool holder into the back panel and push until it snaps into place.

02

Secure the cable from the spool holder behind the cable clips in the back panel.

Install spool holder
03

Connect the cable to the NFC socket at the back of the printer.

Route and install NFC cable

Install the Glass Build Plate

01

Open the glass doors.

Open front doors
02

Open the two build plate clamps at the front of the build plate.

Open front build plate clamps
03

Gently slide the glass plate onto the build plate and ensure that it snaps into the build plate clamps at the back.

Install glass build plate
04

Close the two build plate clamps at the front to secure the glass build plate and close the glass doors.

Close front build plate clamps

Plug-In and Power On!

01

Connect the power cable to the power socket at the back of the Ultimaker S5.

02

Plug the other side of the cable into a wall outlet.

03

Turn on the power switch near the power connection on the printer.


A World of Resources Available to You

Whether you are new to 3D printing or an expert with years under your belt, you can never have too many resources. View our full support and resource section for various OEM’s here.


Next Steps

Loading filament

Before you can start printing on the Ultimaker S3/S5, you need to load materials into the printer. For the first use, it is recommended to use the spools of Tough PLA and PVA that come with the Ultimaker S3/S5.

Model Preparation and Slicing

Cura and other slicing programs transform a CAD model (STL, OBJ, 3MF) into a set of machine instructions that tell your printer how to create your model.

Removing Prints

After your print has completed, it will need to removed from the glass build plate. There are a few separate techniques to accomplish this, and each can have advantages depending on the specific part and whether any additional adhesives were used.

Categories
3D Printing

Recommended Maintenance For Ultimaker 2+ Connect

Maintenance Schedule

To keep your Ultimaker 2+ Connect in optimal condition, we recommend the following maintenance schedule, based on 1,500 printing hours per year. If you are printing more than 1,500 hours per year be sure to adjust your maintenance schedule accordingly.

Click the link for each support topic for detailed instructions in how to accomplish your task.


Categories
3D Printing

Ultimaker Error Codes and Solutions

Your Ultimaker printer has multiple sensors and safety features built in to help ensure your printer is operating correctly and safely. This page will show the common error codes along with links to guides on how to resolve the situation.

Ultimaker S Series Error Codes

Categories
3D Printing

Ultimaker S-Line Maintenance Recommendations

Maintenance Schedule

To keep your Ultimaker S-line printer in optimal condition, the following maintenance schedule is recommended and is based on an expected 1,500 printing hours per year. If you are printing more or less hours in a year, adjust your maintenance schedule accordingly.

Click on a link for directions on how to perform that specific piece of maintenance.